


Greetings!
In this article, the second in my series on JIRA Service Management (JSM), I will be exploring the Project Settings available in a JSM project. Due to the numerous options, and level of detail, available in Project Settings I am splitting this article into two as follows.
This first article covered
Details
Summary
Features
Access
The second article covers
Request Management
Automation
This article covers
Channels & self-service
Operations
Notifications
Language support
Apps
Versions
Components
In my first article I setup a basic JSM project using the ‘out of the box’ functionality and the Customer Service Management template. Now we will go deeper into the available configuration options and discuss what is possible.
It is worth noting that, where additional functionality can be added as part of a paid subscription or license upgrade, I will be covering these in later articles.
Key Principles
The following are a few examples of areas that should be considered, ideally as part of your design for JSM as discussed in the initial article of this series, when planning for the configuration of a JSM project.
Is your Service Desk going to be managing processes other than Incident Management and Request Management e.g. Problem Management, Change Management or Asset Management?
What information needs to be captured for each process, both at the initial creation of a record and through its lifecycle?
Are there existing process templates that can be used for the data capture and workflow?
What queues and views are needed by the teams?
How many customers are being supported and is there a need to split the data by customer?
What integrations are needed? JSM can integrate with
Collaboration tools e.g. MS Teams and Slack
Enterprise Management tools e.g. DataDog
Email integration for a more seamless service experience
Project Settings
We will now go through the sections of the Project Settings menu and see what each sub element lets us configure.
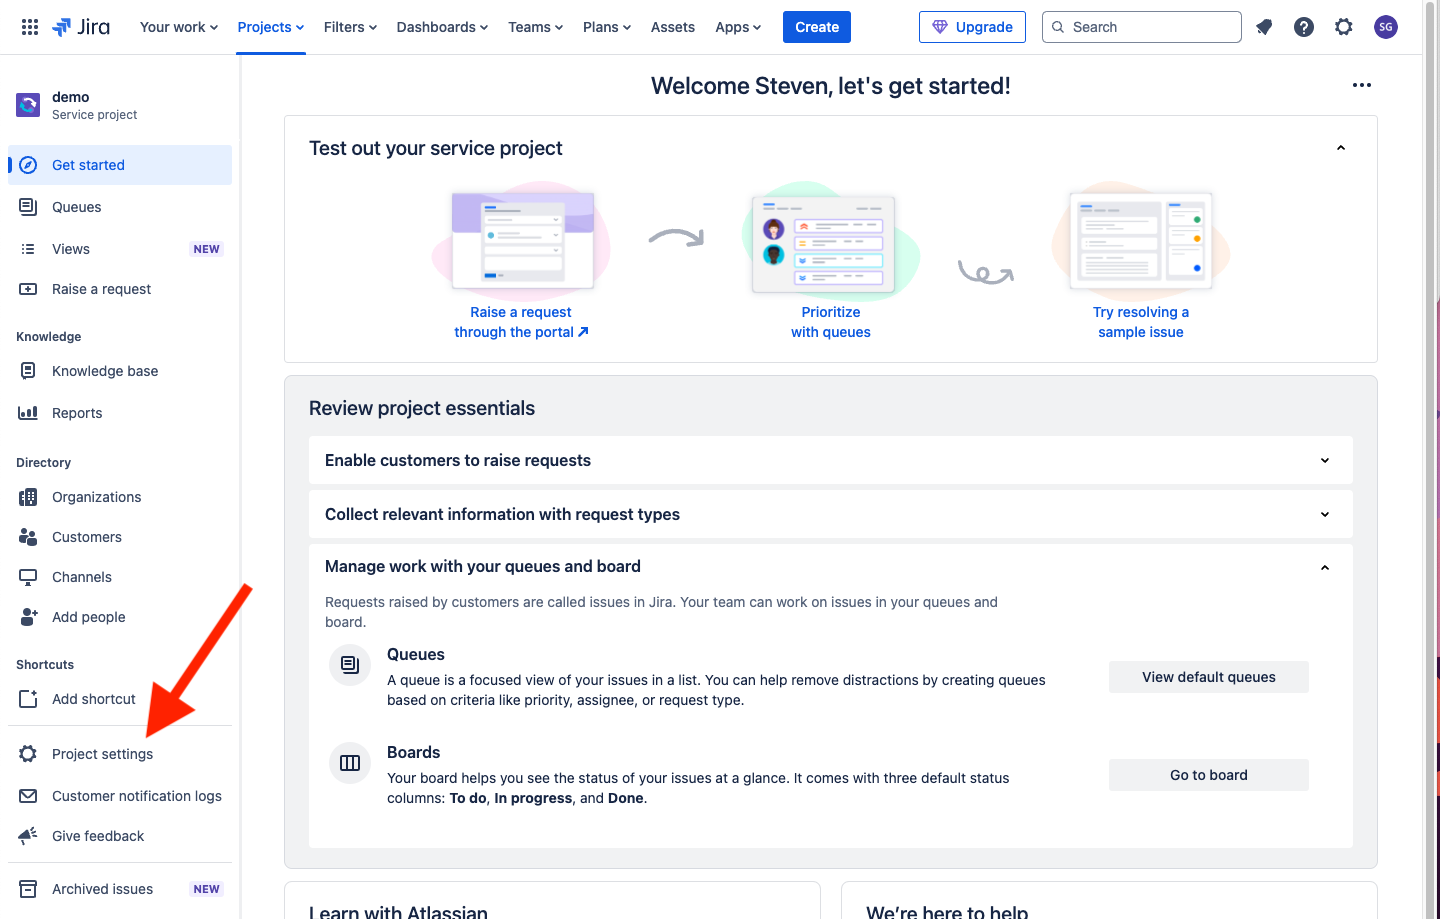
This is accessed from the link shown below, you must have Admin permissions to see this link.
Channels & self-service
Portal
Portal Configuration
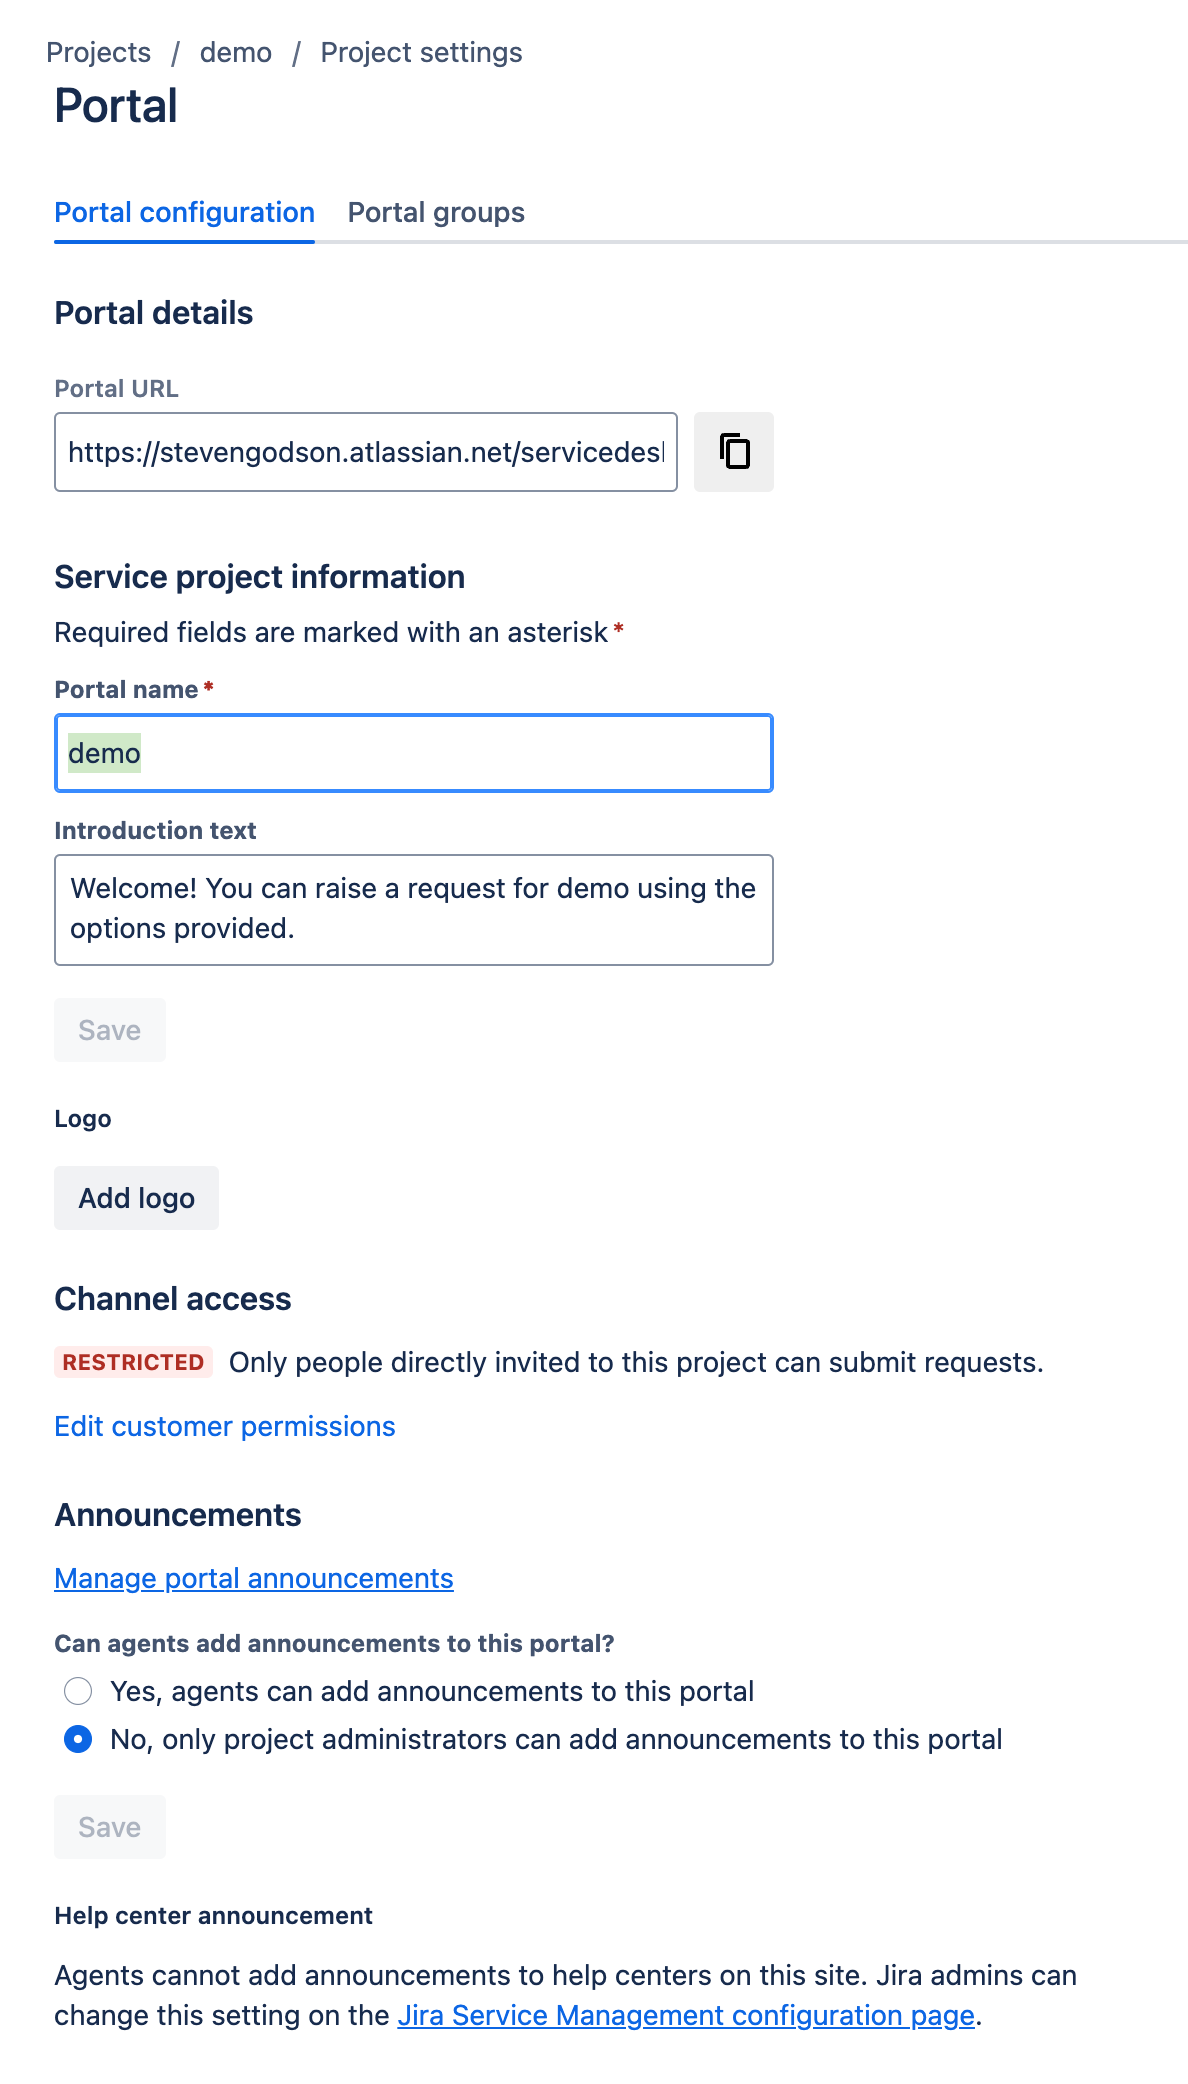
Portal URL - this is the link to your external facing portal for your service desk
Service project information
Portal name - a mandatory title for your service desk project, this is visible internally and externally
Introduction text - the text that customers / users will see under the service desk project (Portal) name
Logo - allows you to add a logo to the portal which will sit beside the portal name
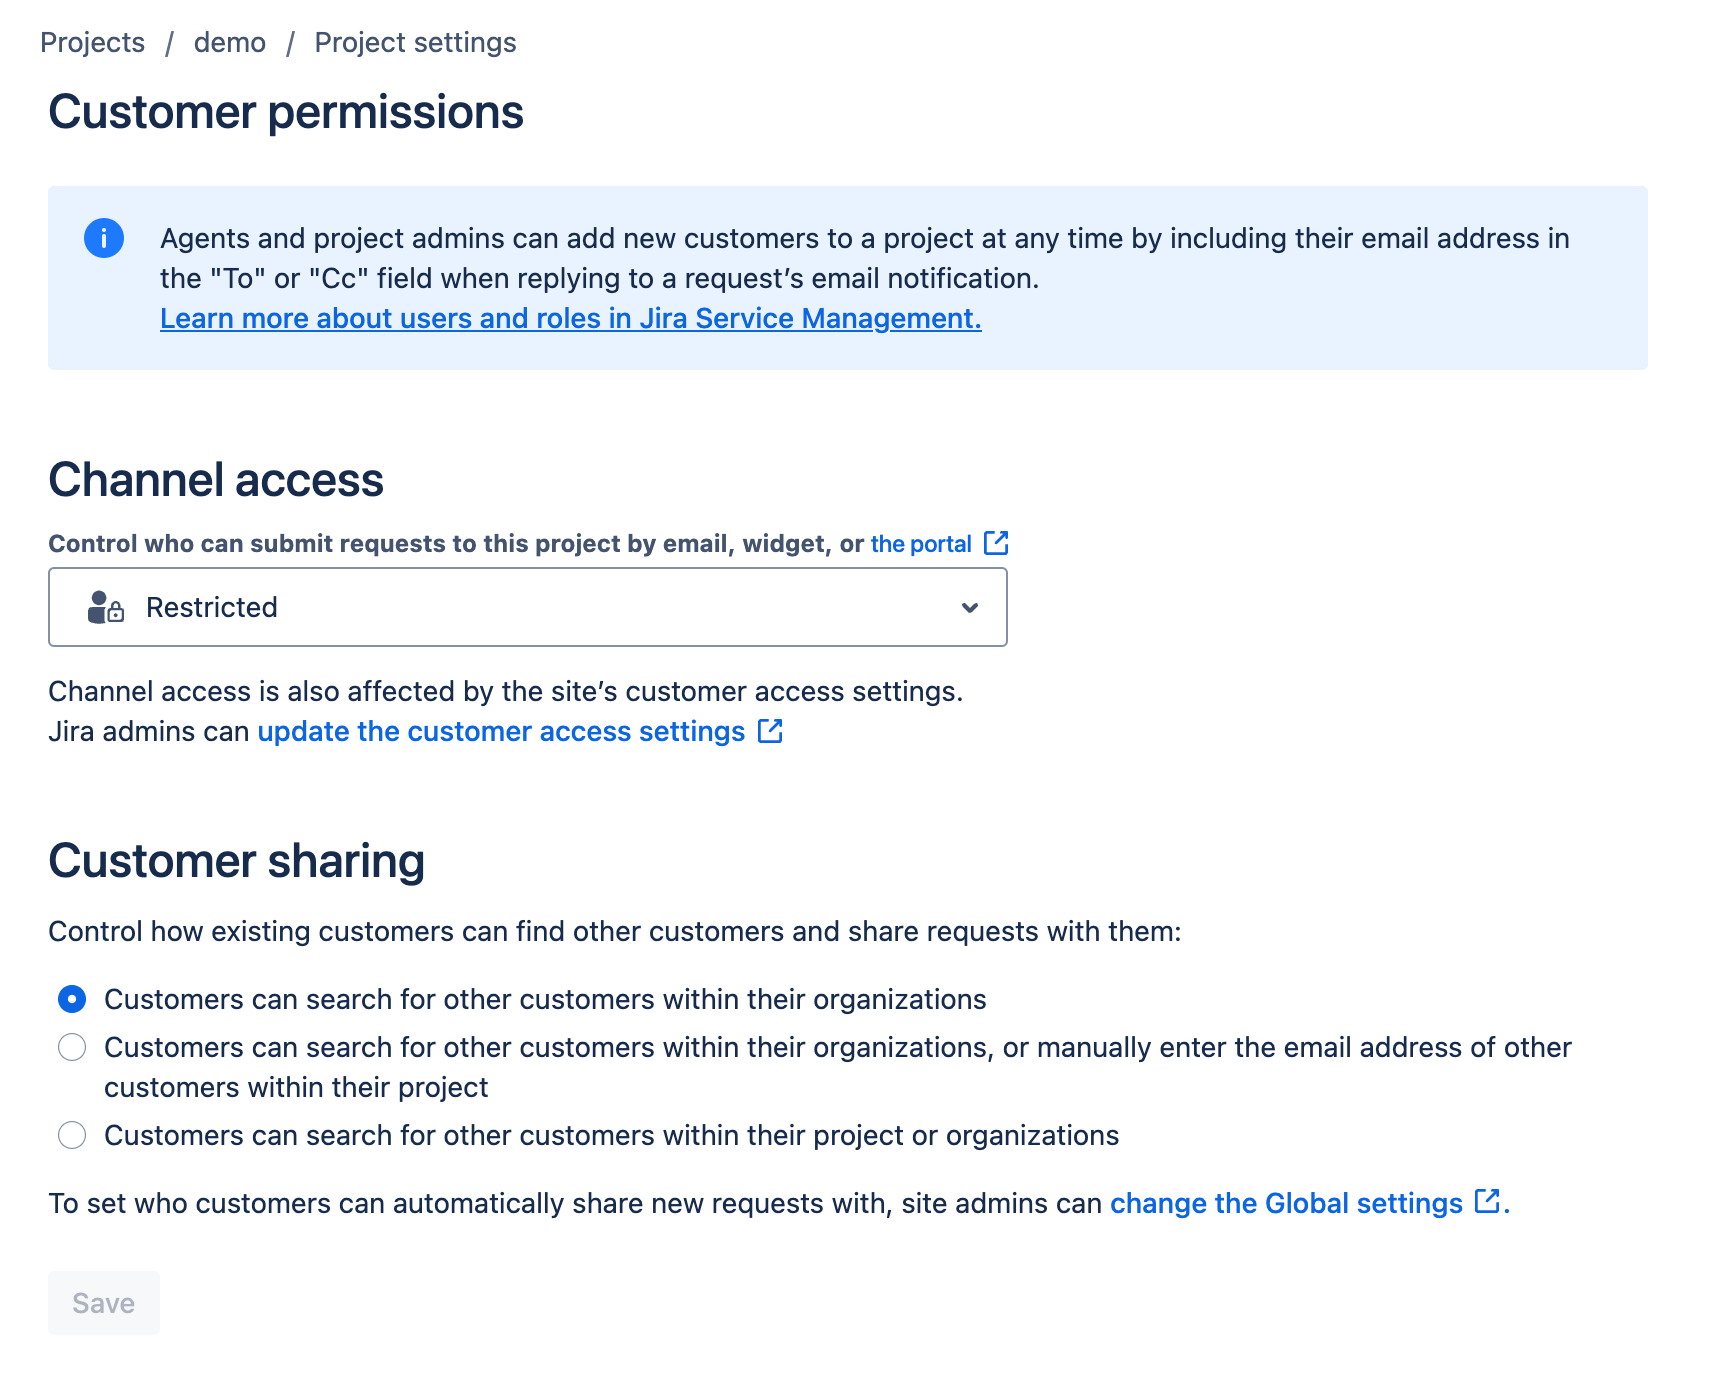
Channel access - clicking of Edit customer permissions opens a new page where you can
Decide who has access to the portal, and other engagement routes, e.g. Restricted to users who have been given access or Open to anyone who has the link
Decide what customers can see within the project. This very much depends on whether your service desk project supports multiple customers or just one and the data privacy regulations that you need to comply with
- Announcements - controls who can add banner announcement messages to the portal e.g. notifying users of an upcoming service outage or major Incident
Portal groups
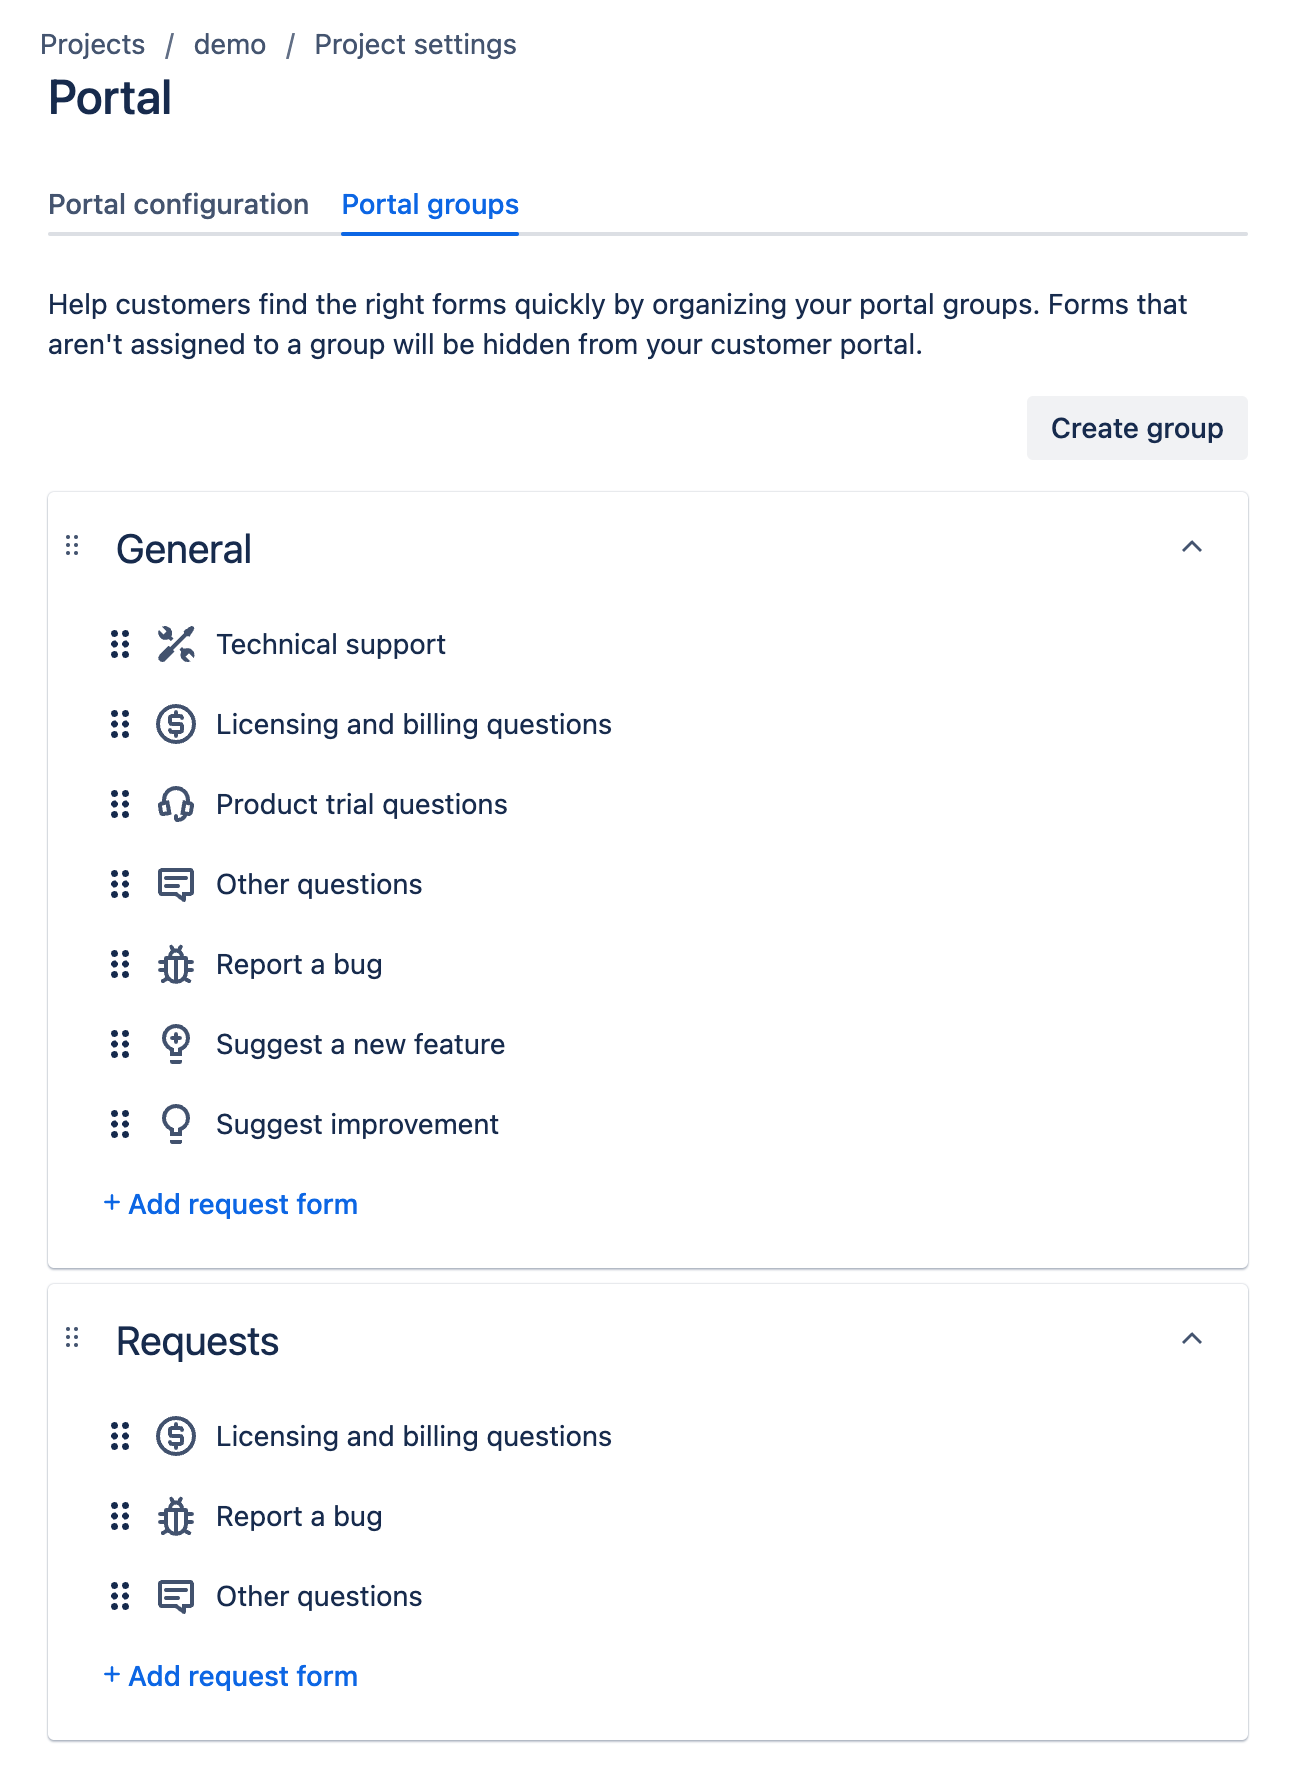
This tab allows you to add sections to your portal to enable a logical grouping of request types e.g. Incidents, Requests, Changes etc. By default it comes with the General group populated with 7 request types, assuming you have that many in your project. The groups can be re-ordered by clicking on the top left of a group tile and dragging around the page
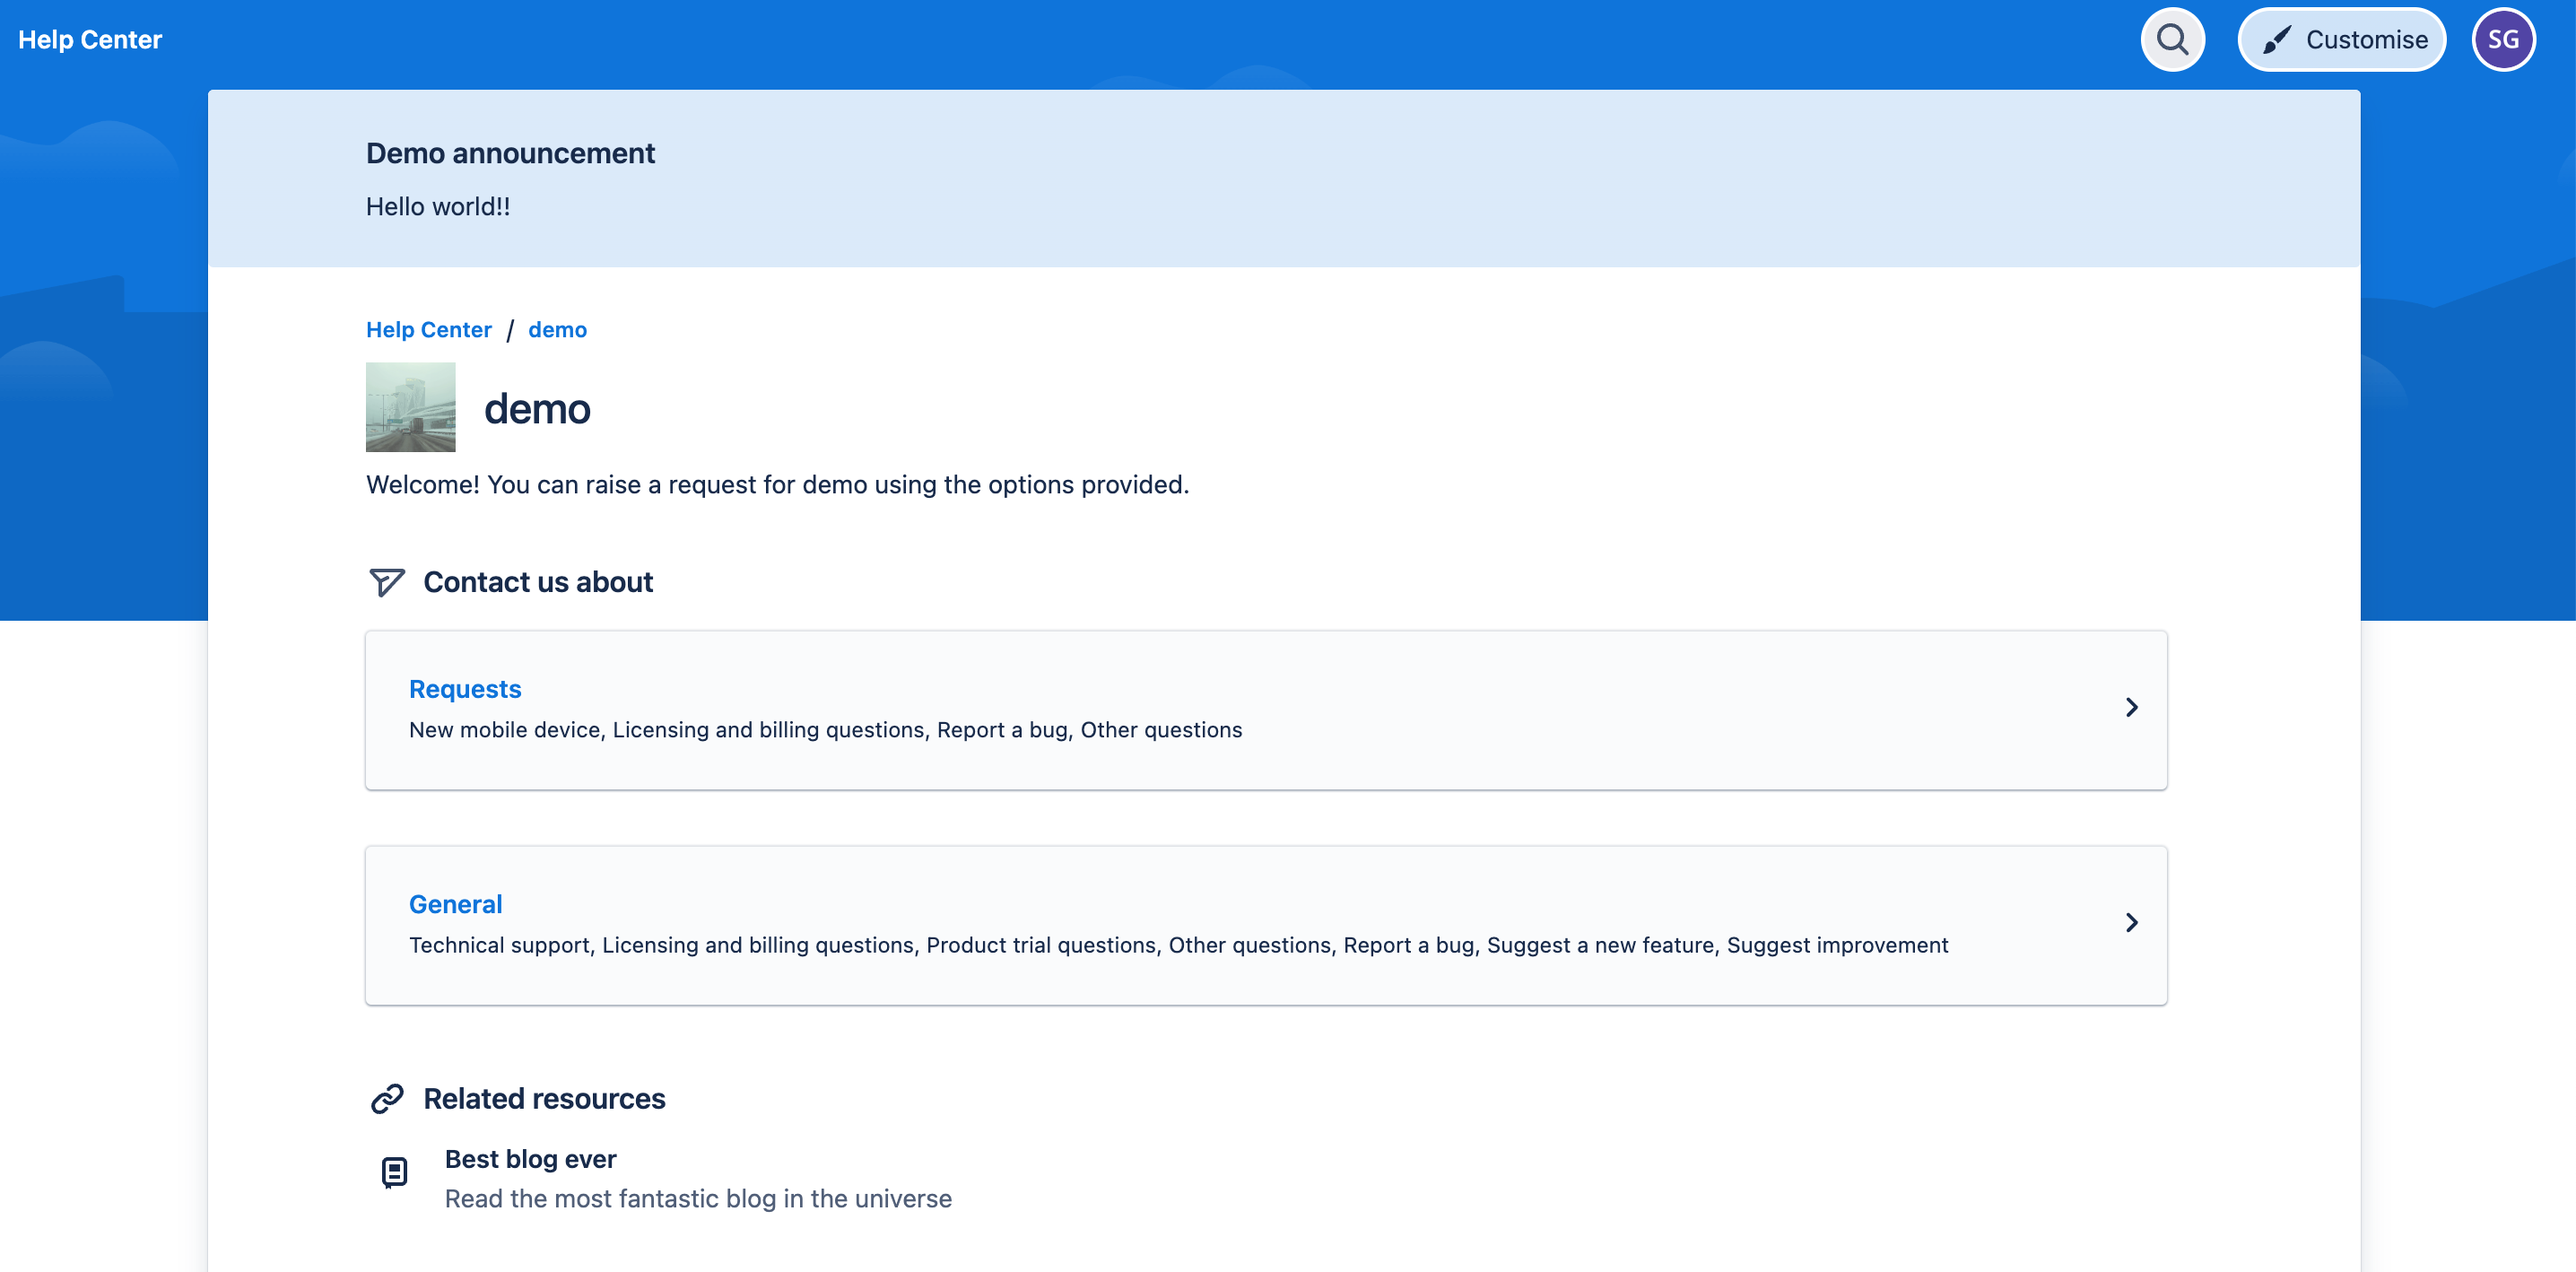
Final View
Once you have configured your portal you can use the Portal URL to see what it looks like. I recommend making changes incrementally and checking the portal after each change so you can see the results in real time.
Below is a simplistic view of where your changes will be visible.
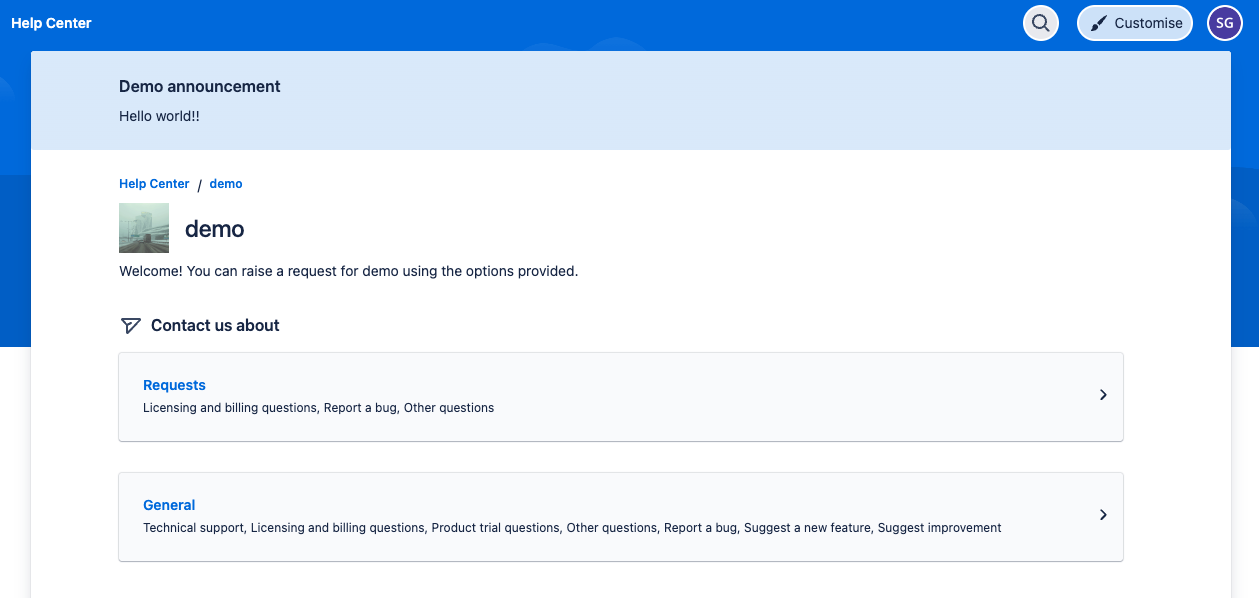
If you look at the top righthand corner you will see me logged in as a user, a search icon and a Customer button, the latter only being available to those with permissions to add announcements.
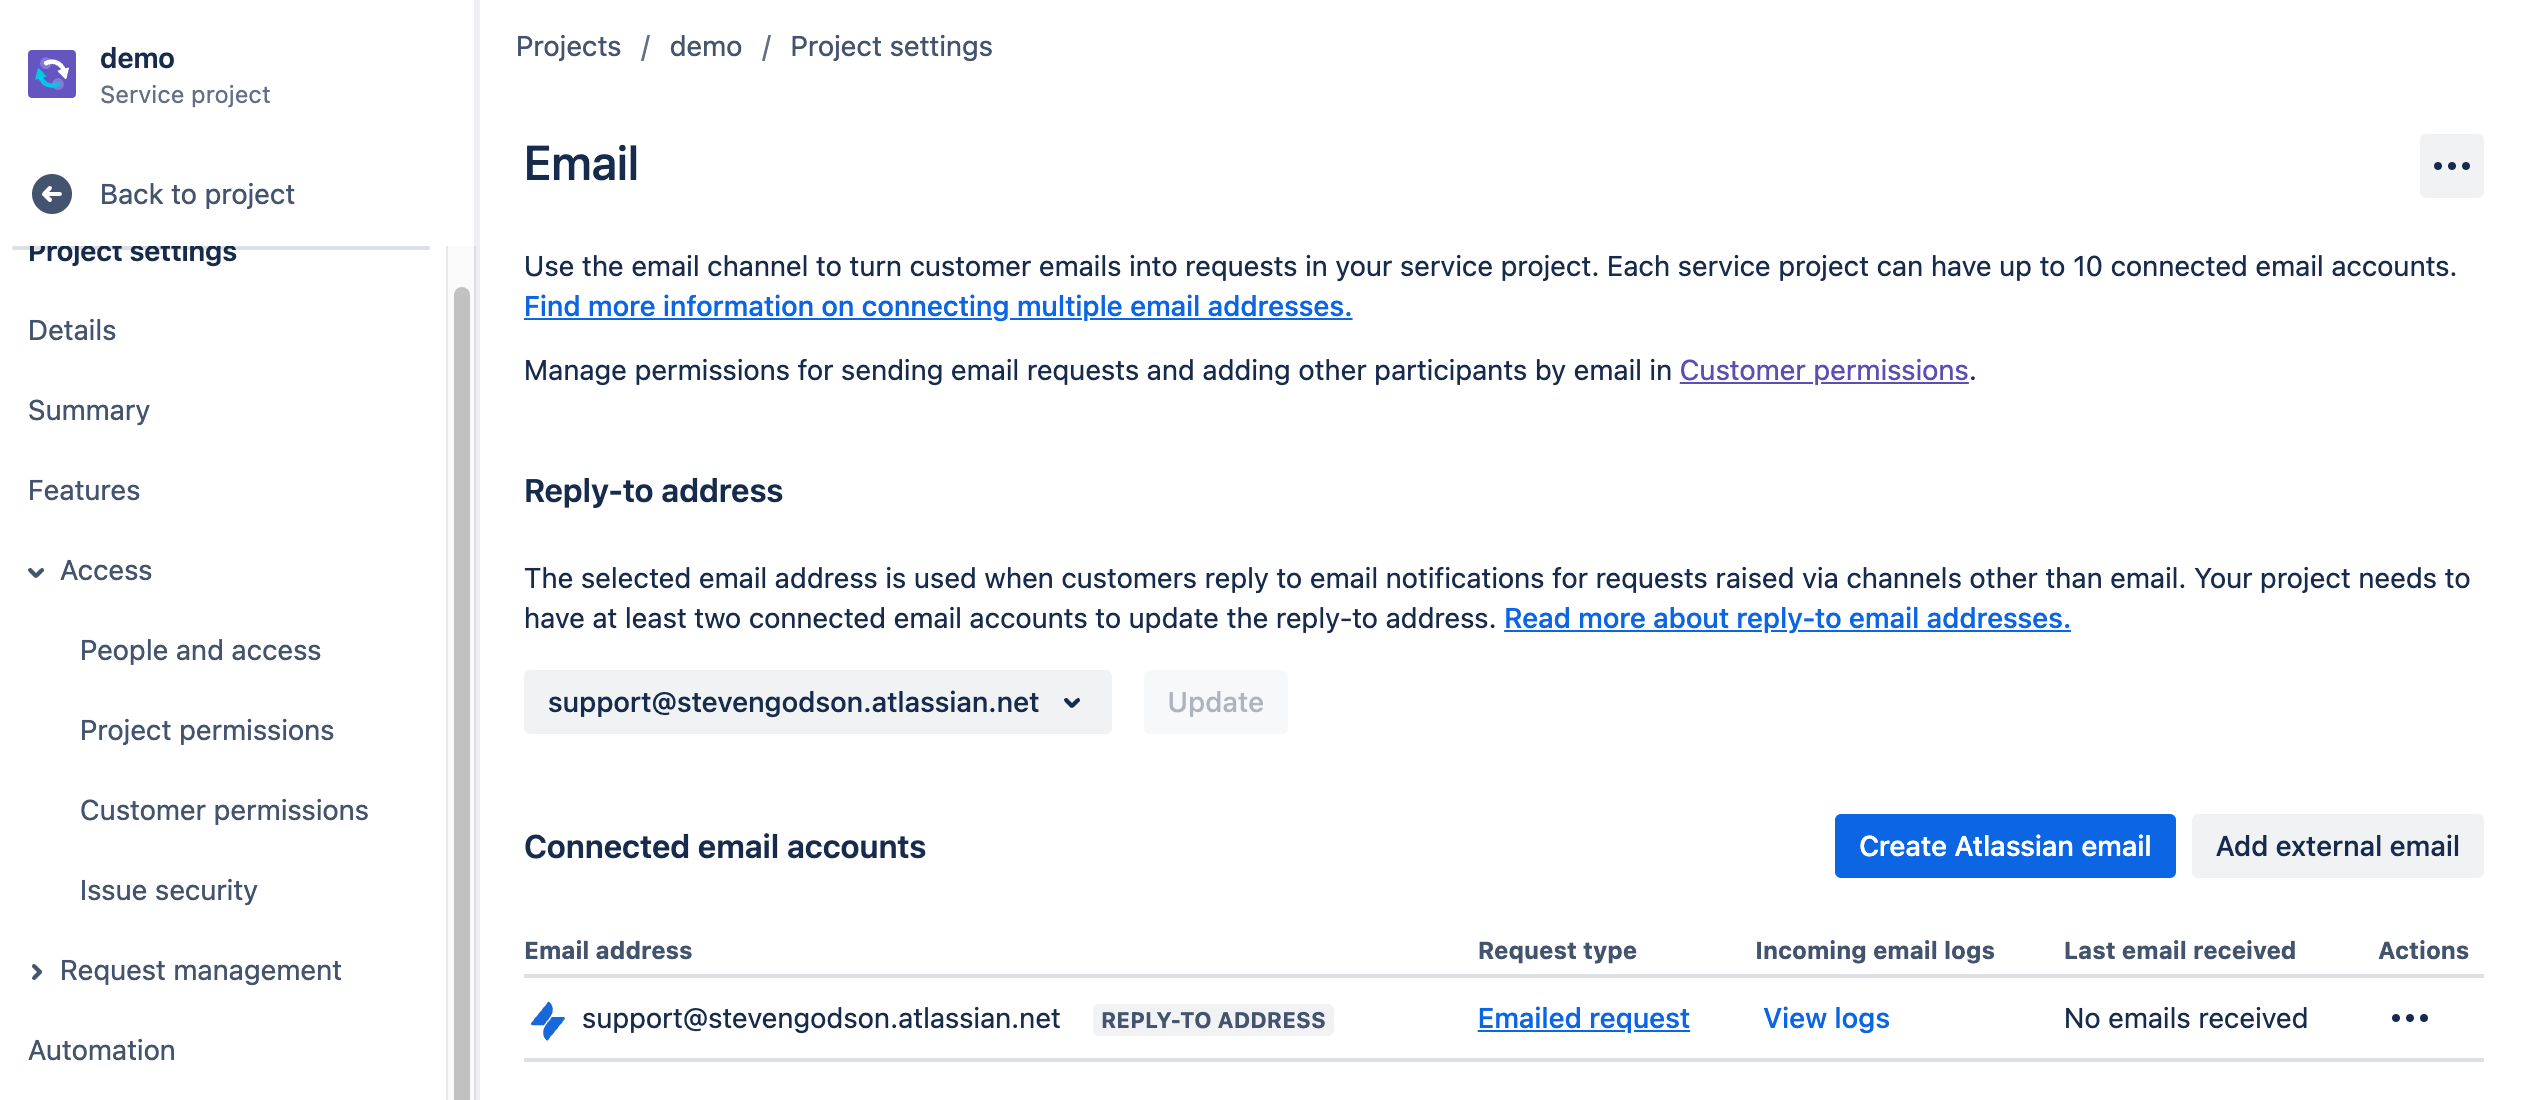
The Email section provides the capability to manage the email addresses that customers / users can use to report issues and request services.
The default email address is support@[your-account-name].atlassian.net. However, this can be amended by clicking the ellipsis, under the Actions heading, and selecting Edit. This opens the following pop-up from which the email address name can be amended and the Request type that will automatically be created upon receipt.
You will notice that the Request types in the drop down field represent the full list of Request types that were created earlier in this article.
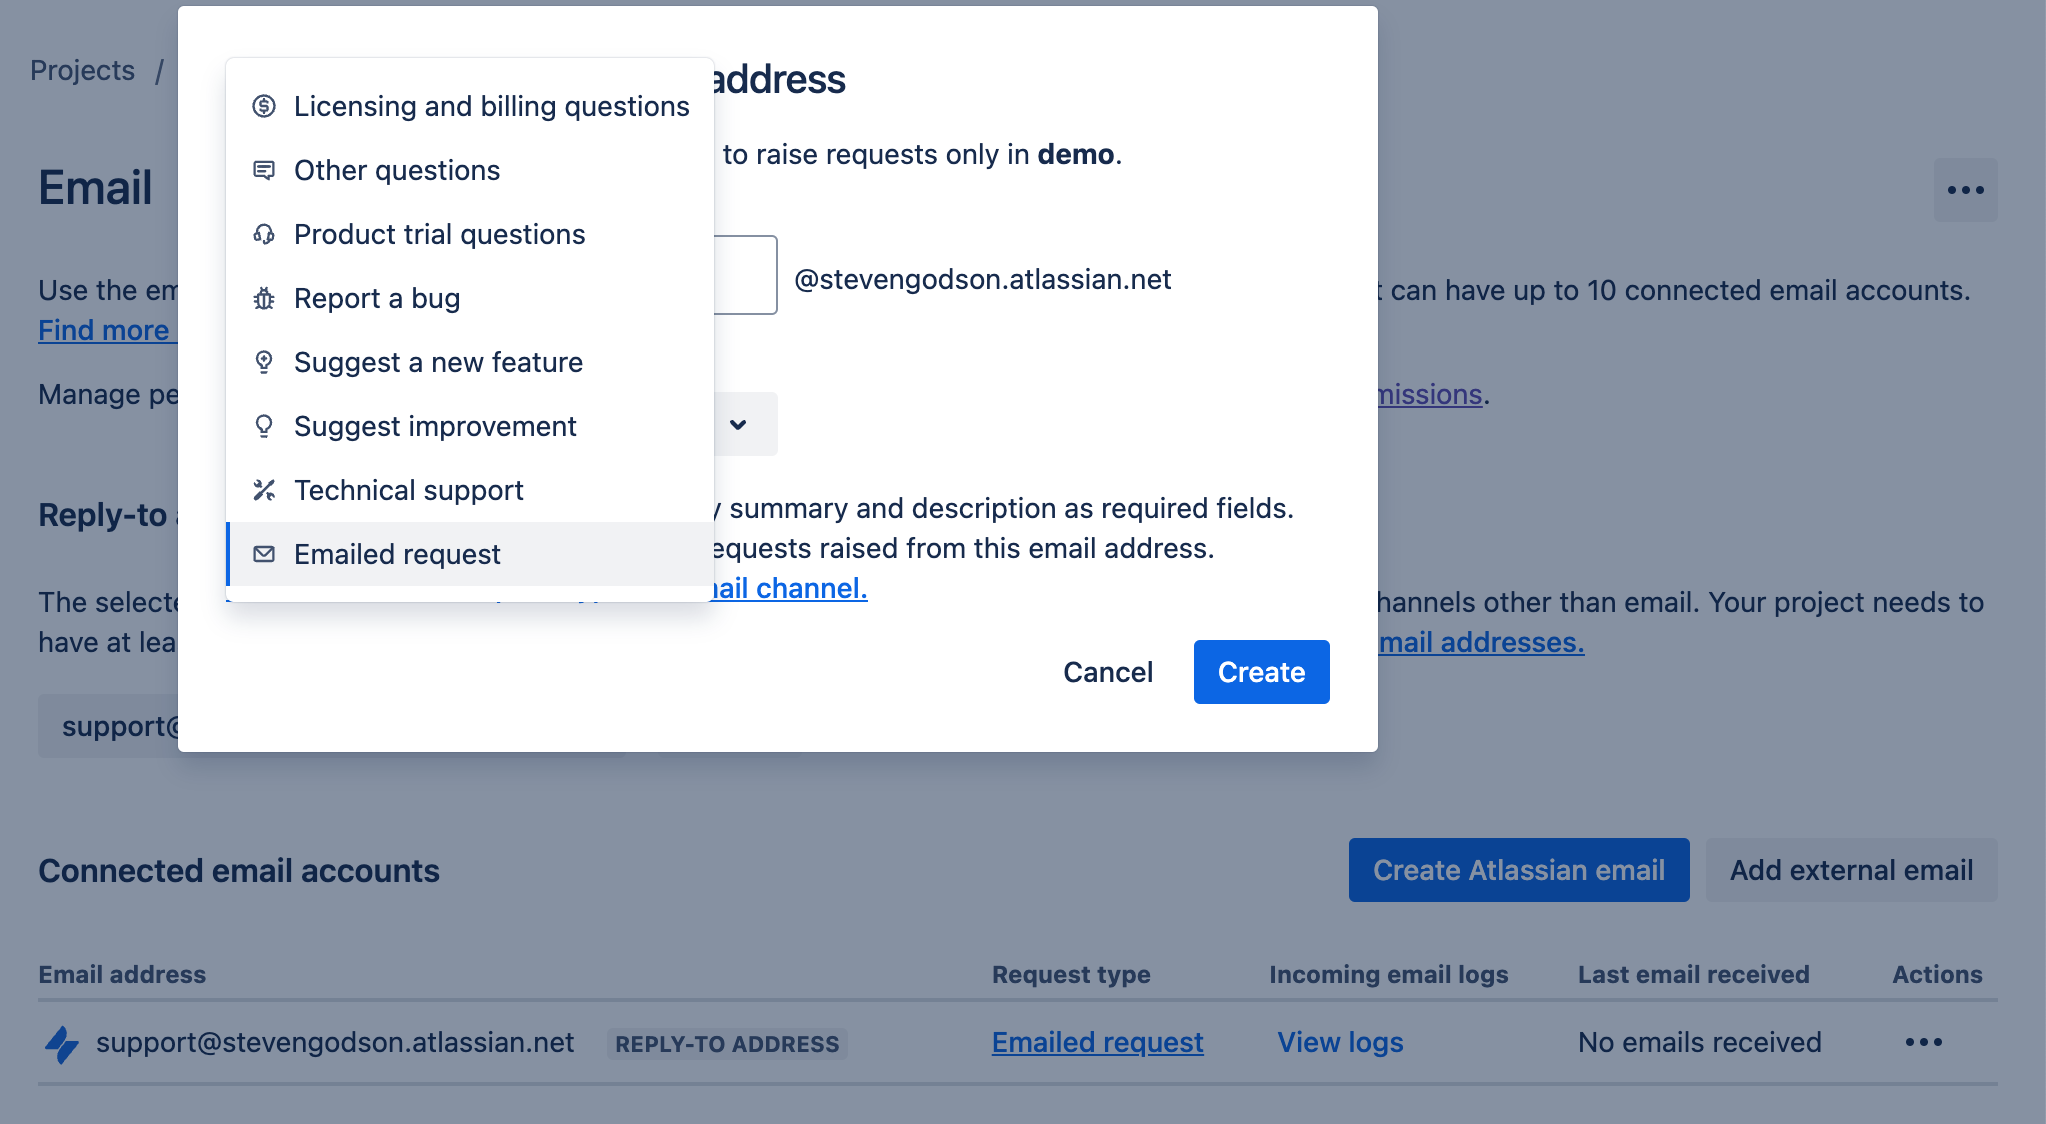
If you want to create multiple email addresses then click on the Create Atlassian email button which opens the same pop-up form.
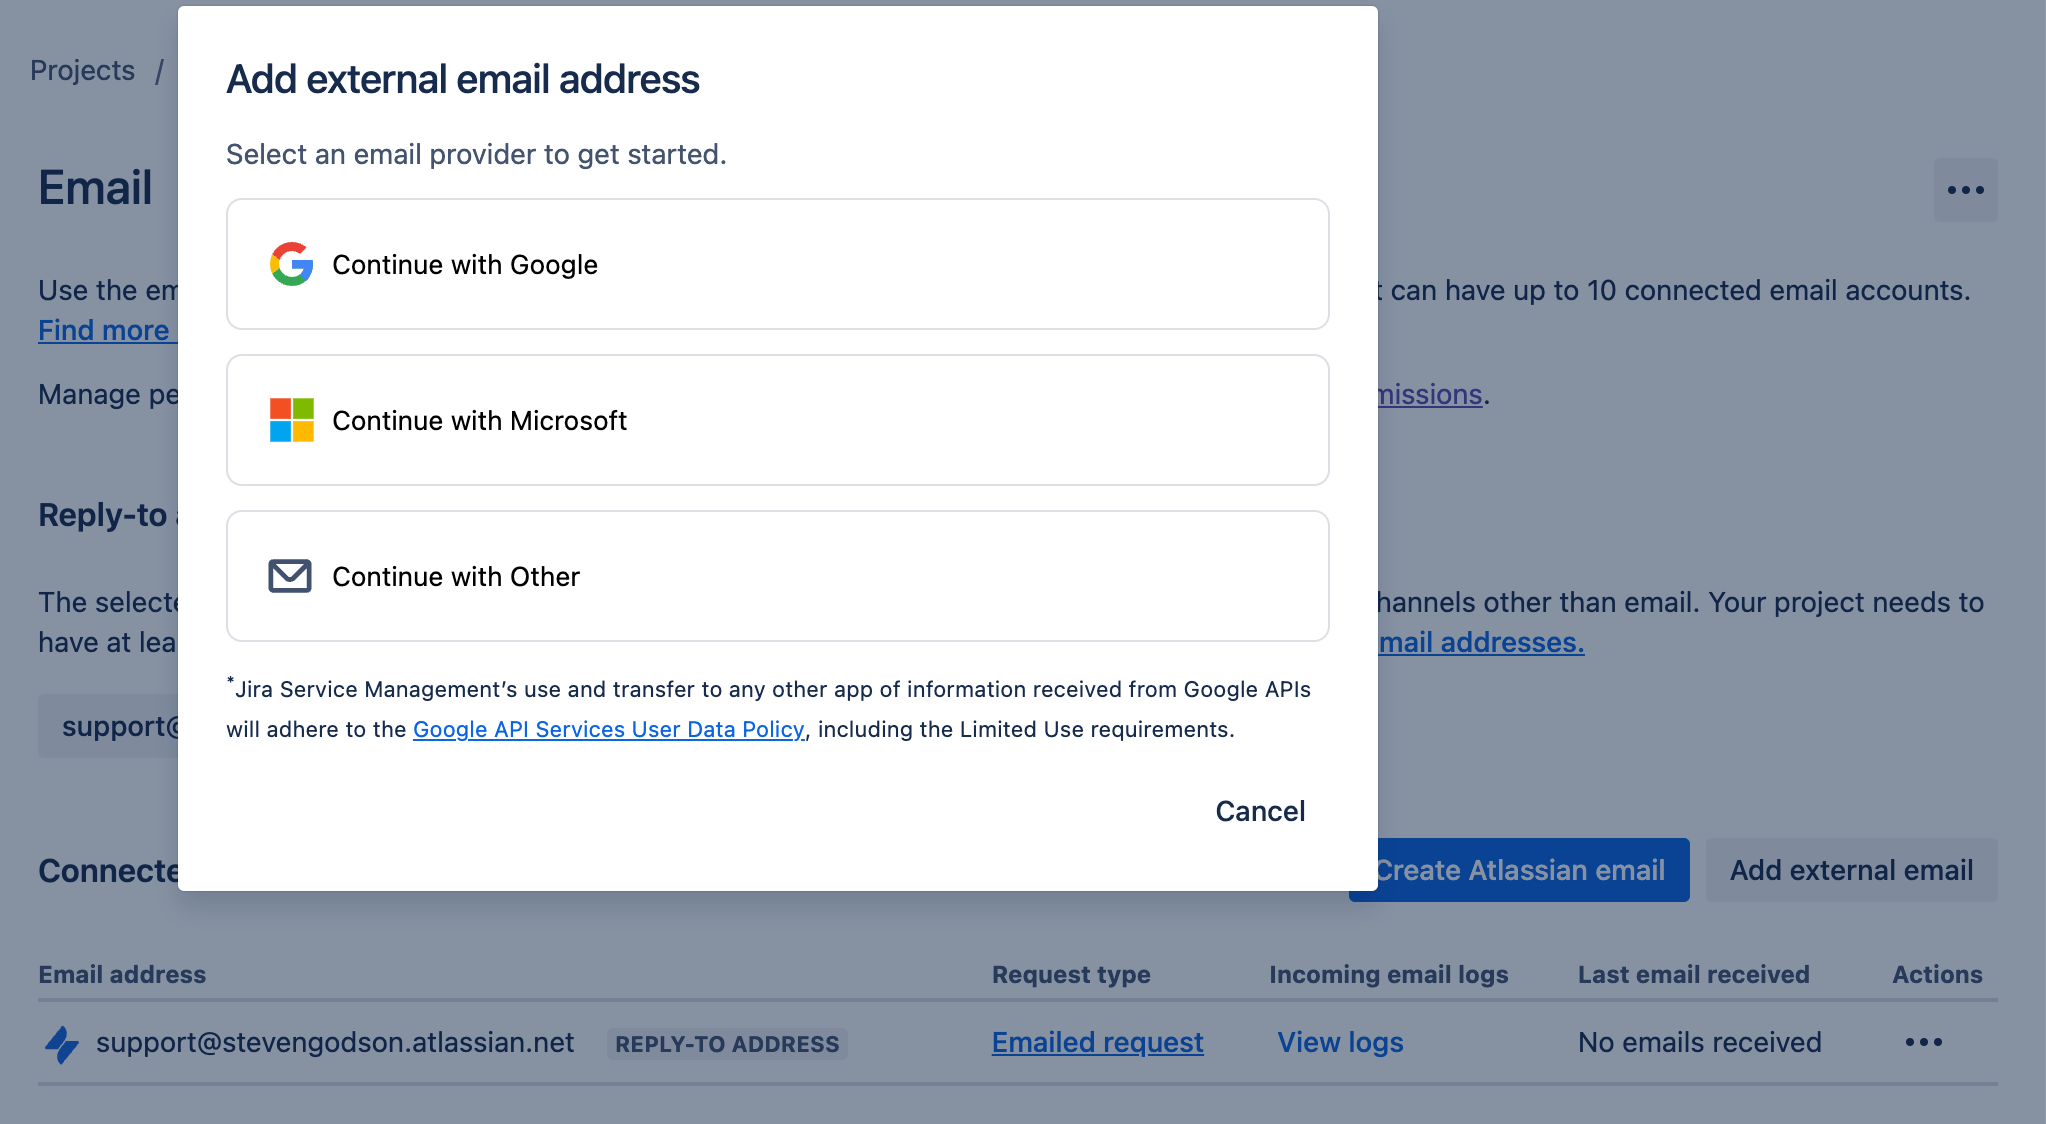
It is also possible to link external emails to your project, useful if you want to keep a corporate “feel” to the service desk. Simply click on the Add external email button, select the option that fits your use case and follow the instructions to connect to your email provider.
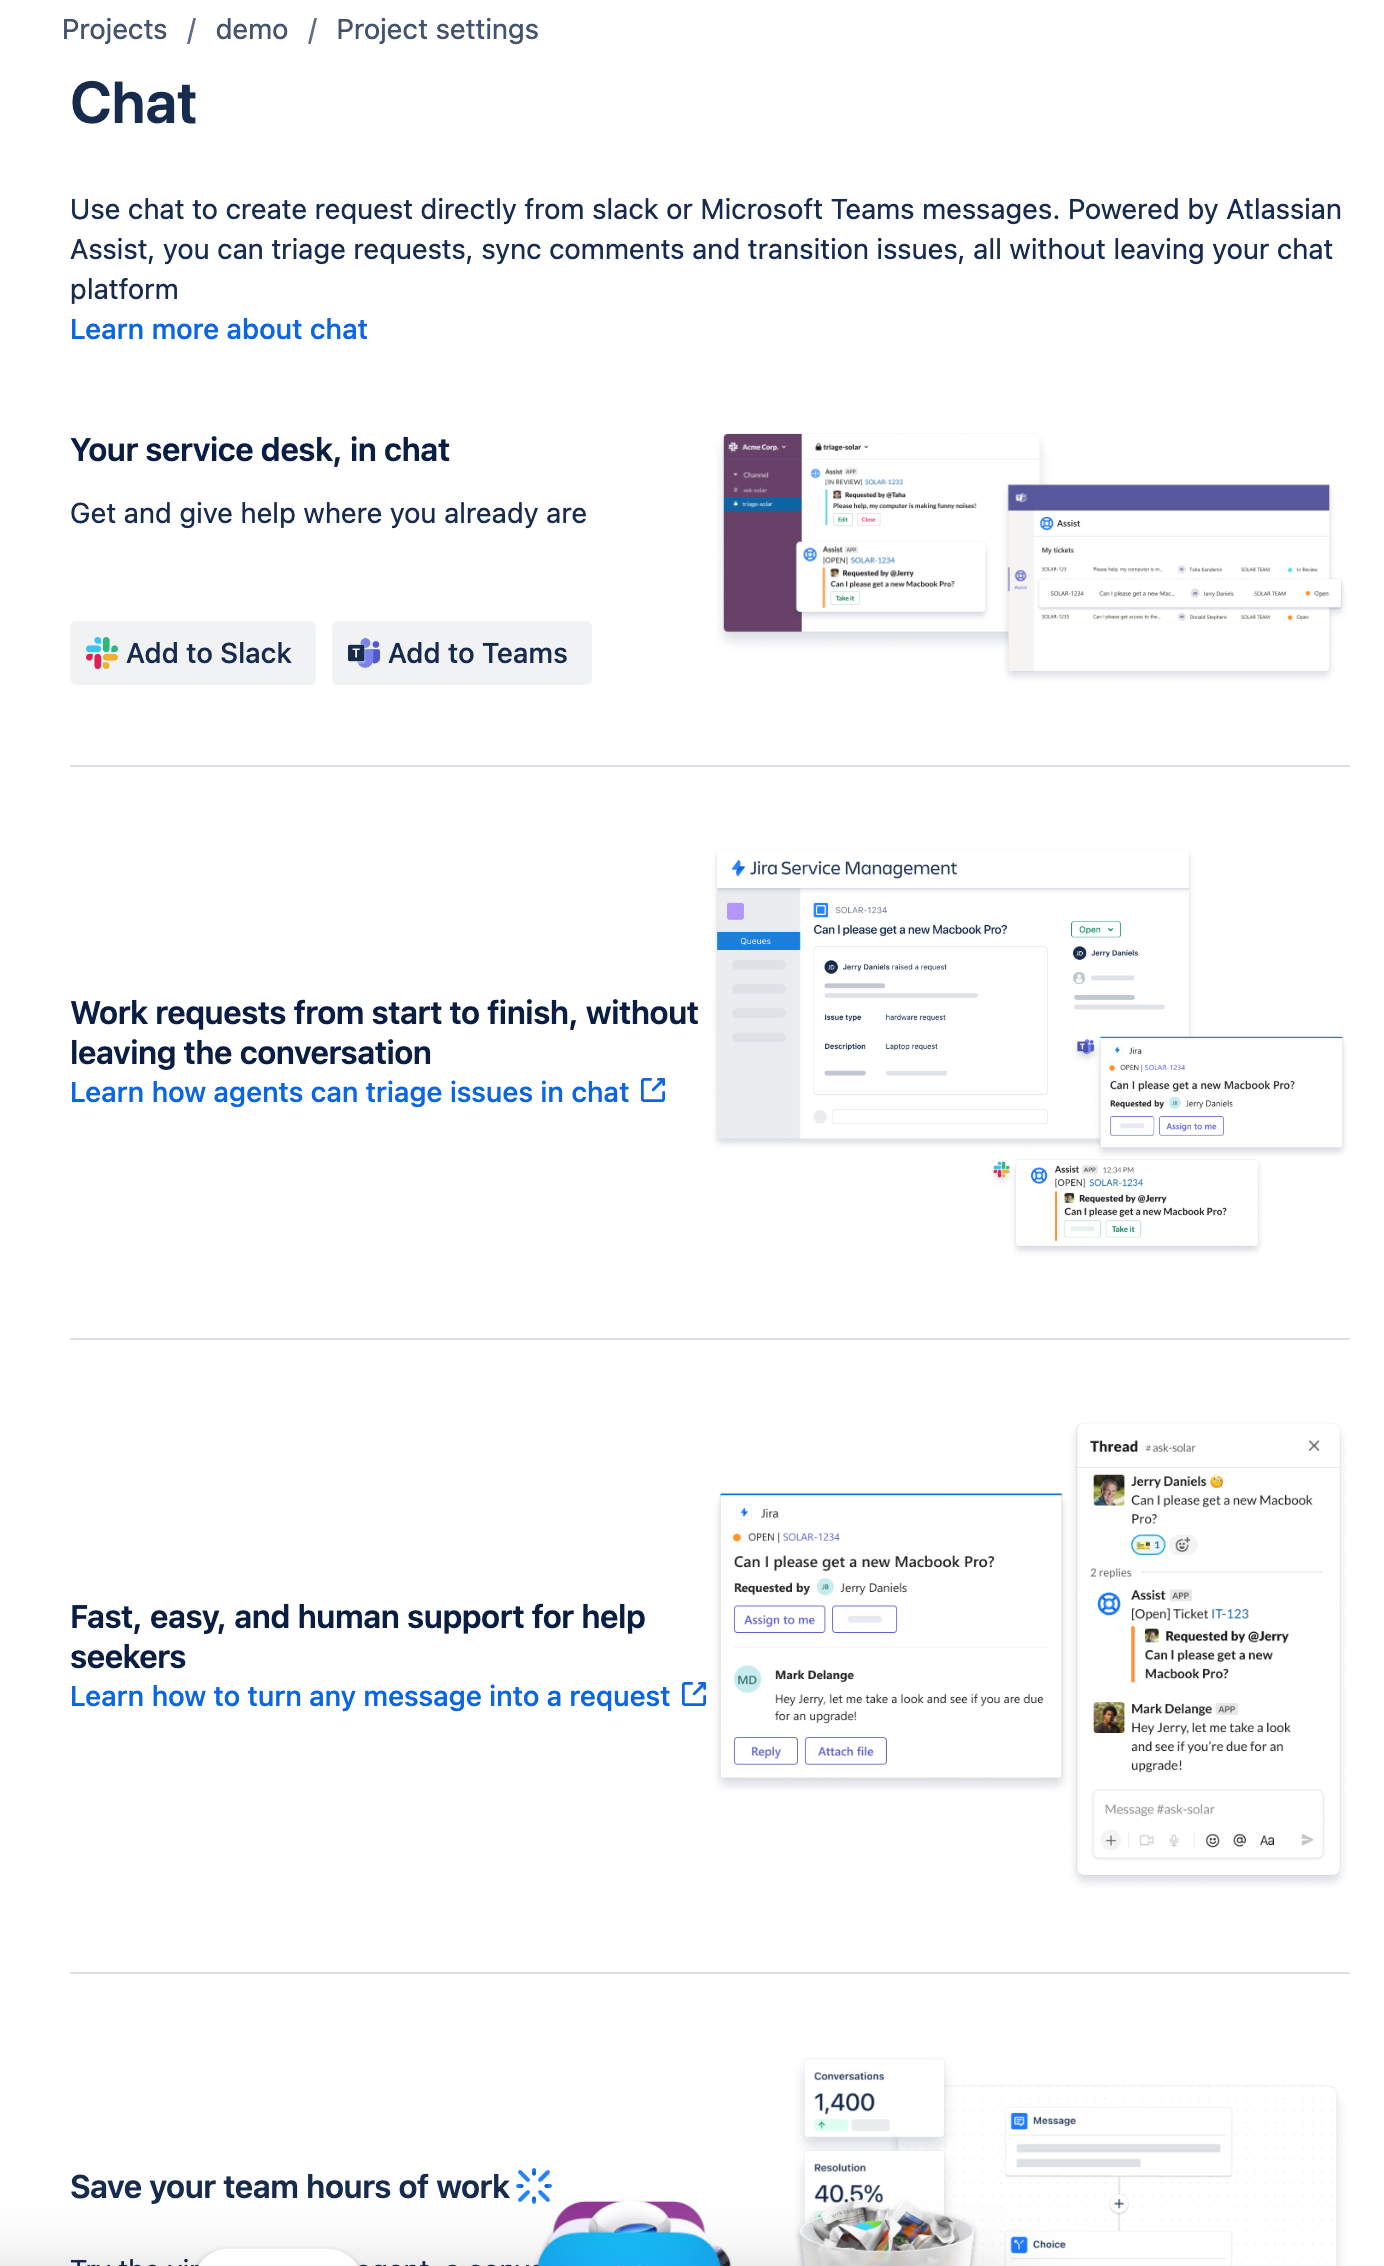
Chat
The chat options of JSM are shown as four streams.
Integration - with Slack or Teams to give a more integrated feel to the customer experience, crucial in a world where Experience Level Agreements (XLAs) are ever pushing their way into the foreground of CIO thinking
Workflows - seamless fulfilment of requests within the chat
Chat to Request - including triggers within a chat to allow agents to generate request records from a chat message
Virtual Agent - the ever ubiquitous use of AI and Machine Learning to support customers through automation and knowledge bases
Widget
The Widget page gives you the functionality to configure a deploy a widget to the customer portal that can be used to
raise an issue with the service desk
search the knowledge base
engage with a virtual agent
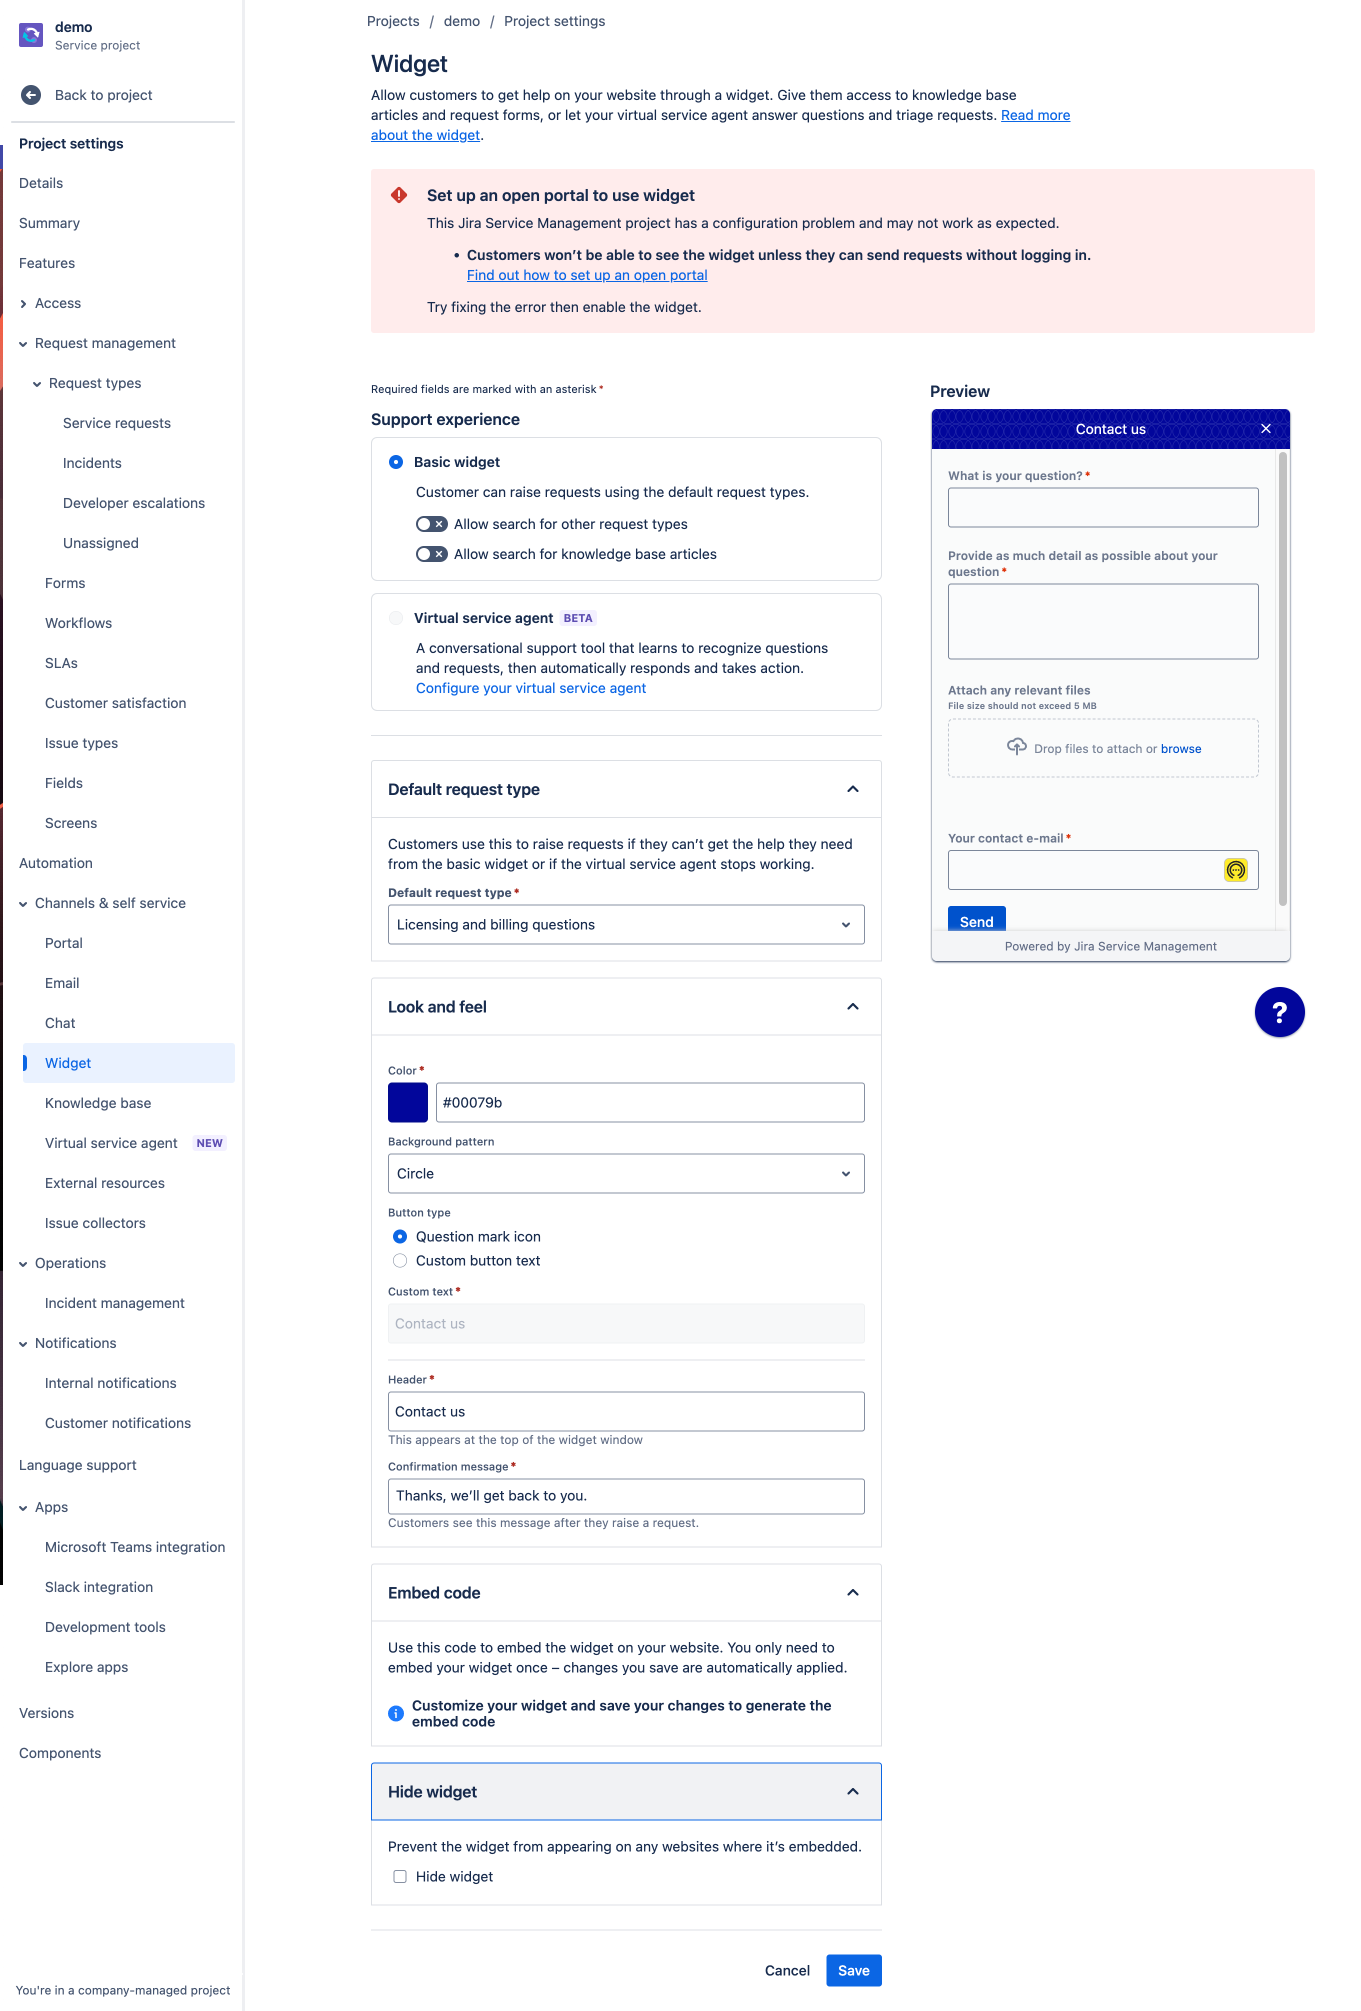
Note: you will need to have portal access set to Open before you can add a widget. This can be set from the Portal settings page.
Knowledge base
The JSM knowledge base is a feature that needs to be enabled but, currently, incurs no cost. It essentially deploys Atlassians Confluence product.
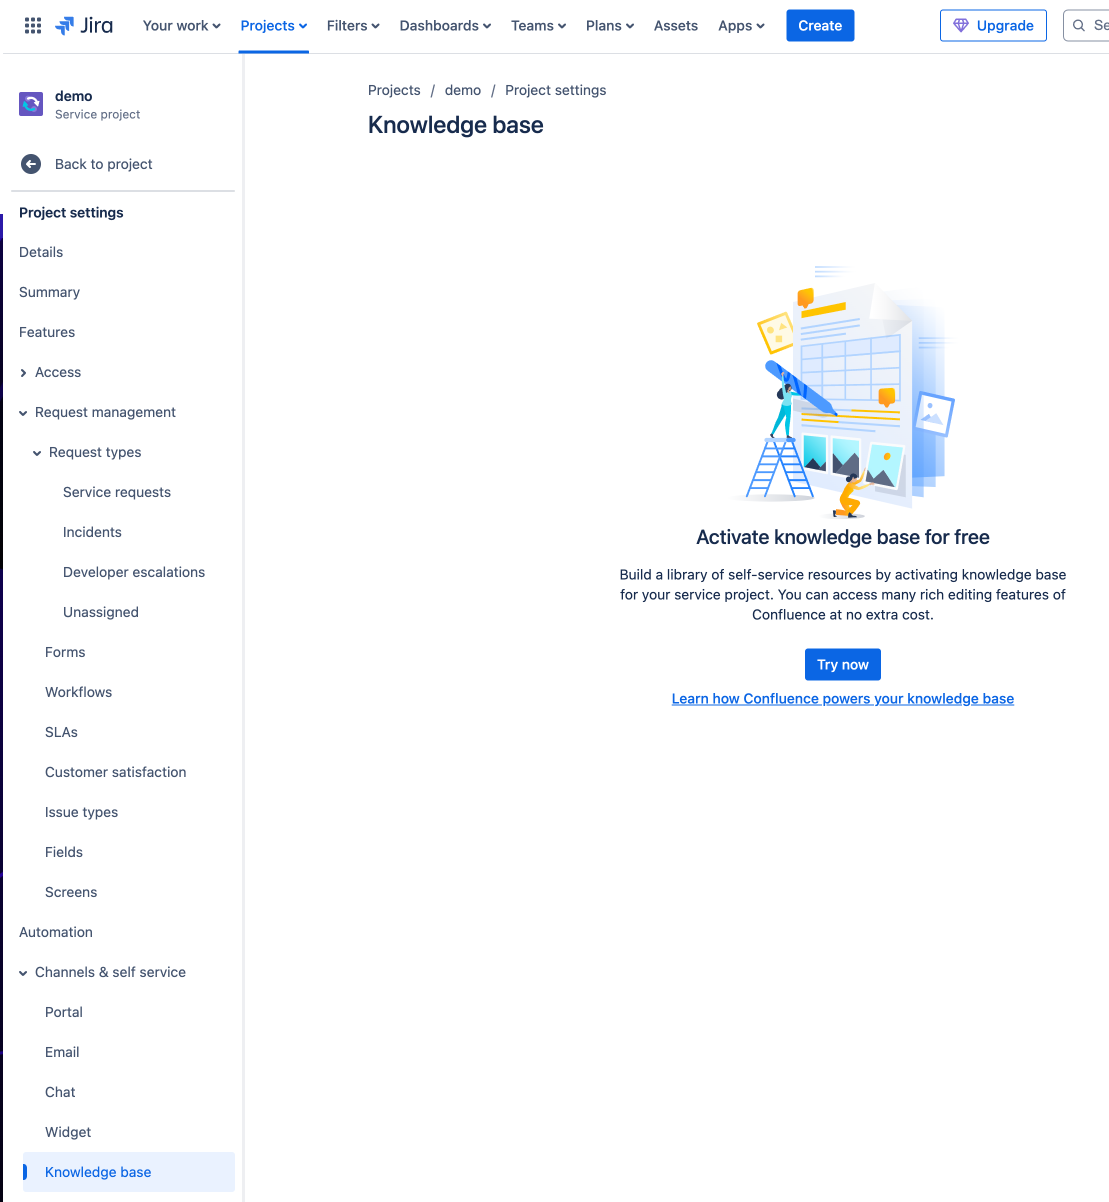
To add a knowledge base you will need to
Click on Try Now
Accept the T’s and C’s on the next screen and wait
Then, once the last screen appears click on Go to knowledge base
You will be taken to the following screen where you can see
Create spaces
Link an existing space
Set who has visibility
Select which articles are shown

Virtual service agent
The Virtual Service Agent is an AI driven tool that can enhance the customer experience and shift volumes away from the service desk agents, allowing them to focus on more value add activities.
However, as this incurs an additional cost it is out of scope for this article.
External resources
The screen is used to add links to external tools and / or websites, outside of Atlassian, that customers will find useful. To add one you just need to
Click on Add link
Populate the form, as shown below, and click on Add
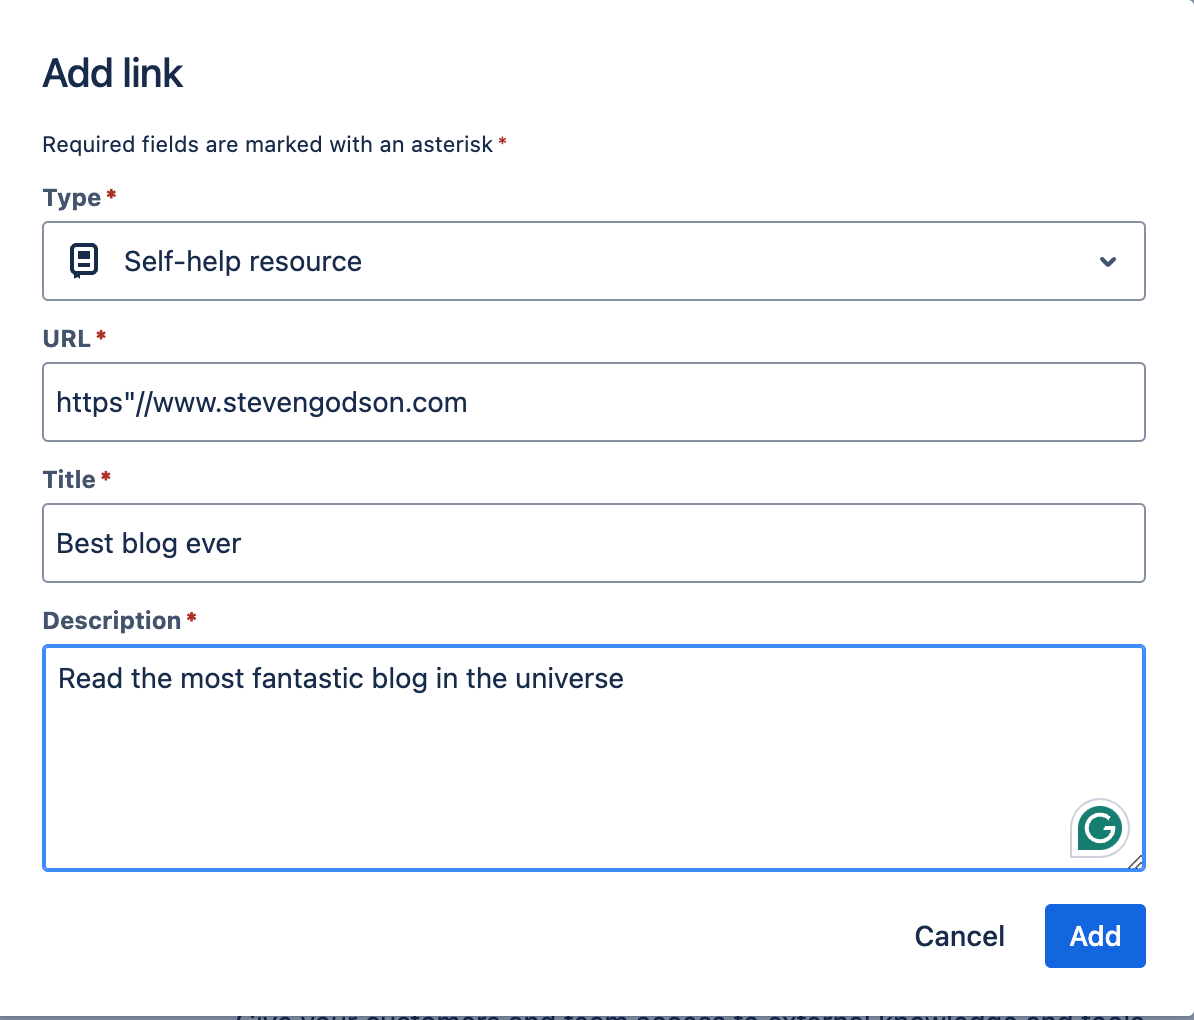
The link will now be visible on the customer portal, as shown below.
Issue collectors
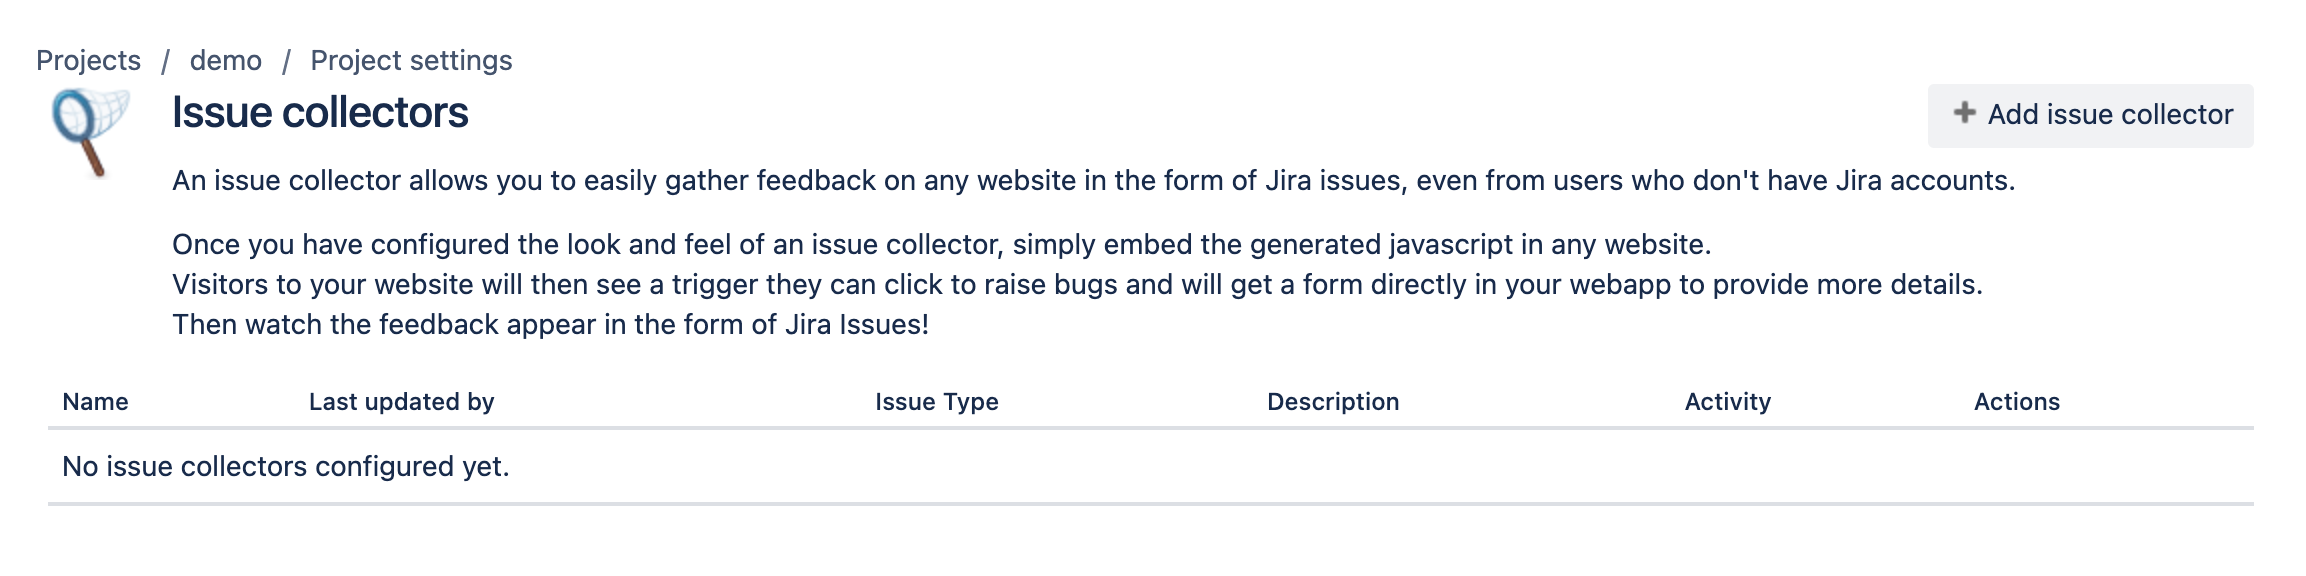
Issue collectors are a great way to engage your users, from any website that can run JavaScript, to provide feedback or raise an issue. To add one click on Add issue collector and populate the screen that appears.
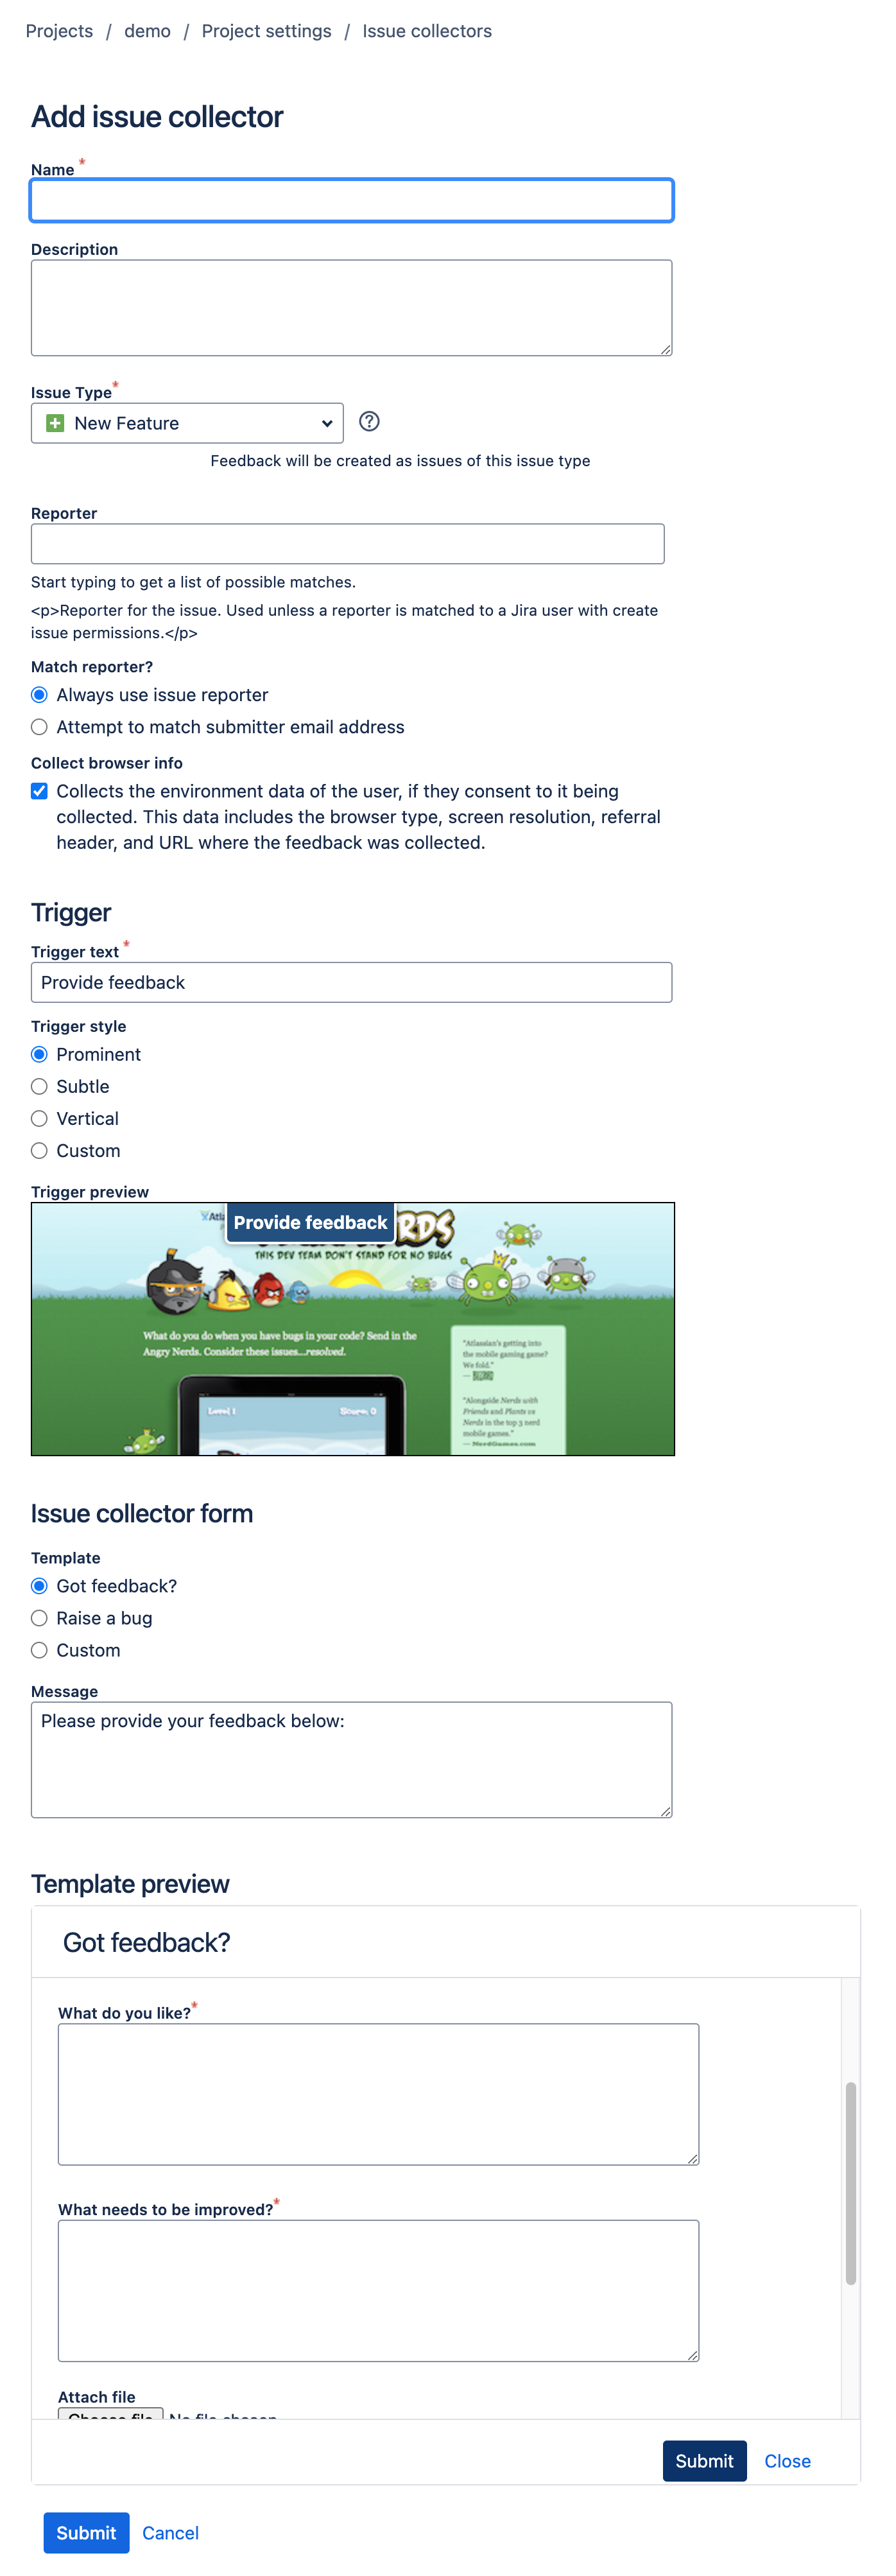
Once you have customised the collector configuration to meet your needs, click on Submit and you will be taken the the following screens that provide you with the HTML and jQuery code that you need to include in the website that the collector is for.
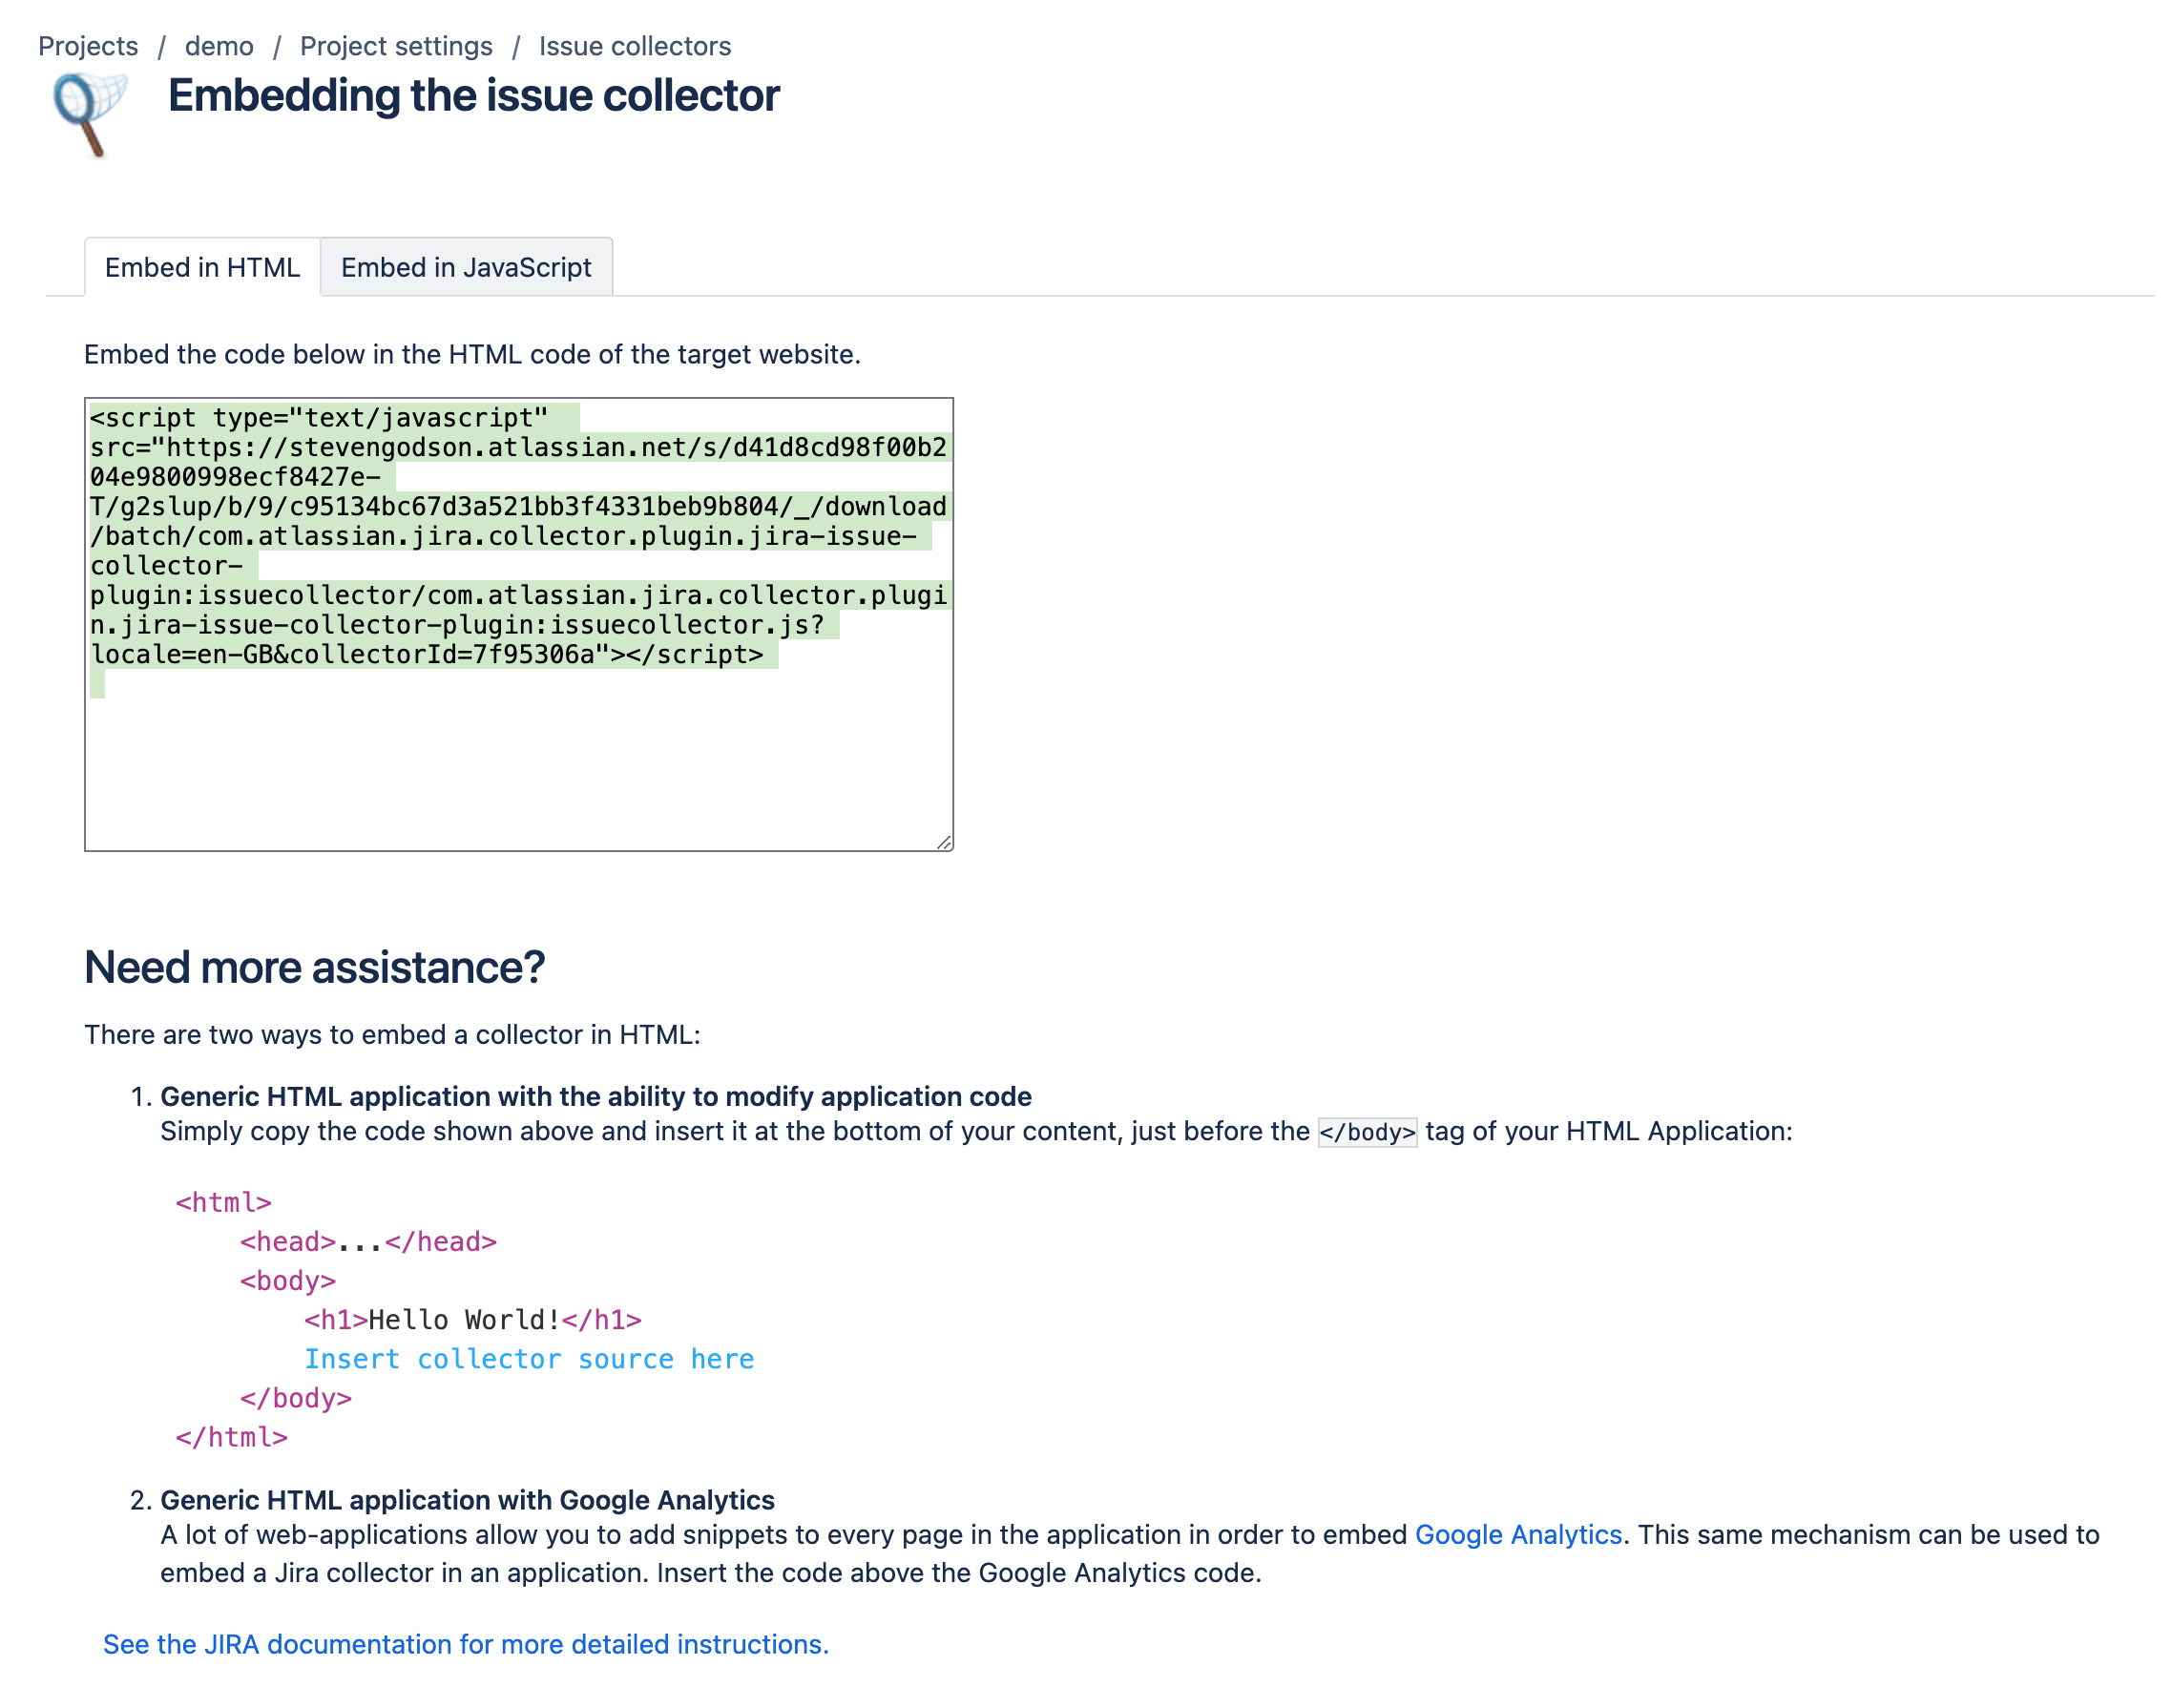
HTML

JQuery
Operations
In the view shown below only Incident Management is listed. However, if you take out a Premium or Enterprise plan, and switch on Problem Management or Change Management, they will appear in this part of the menu as well.
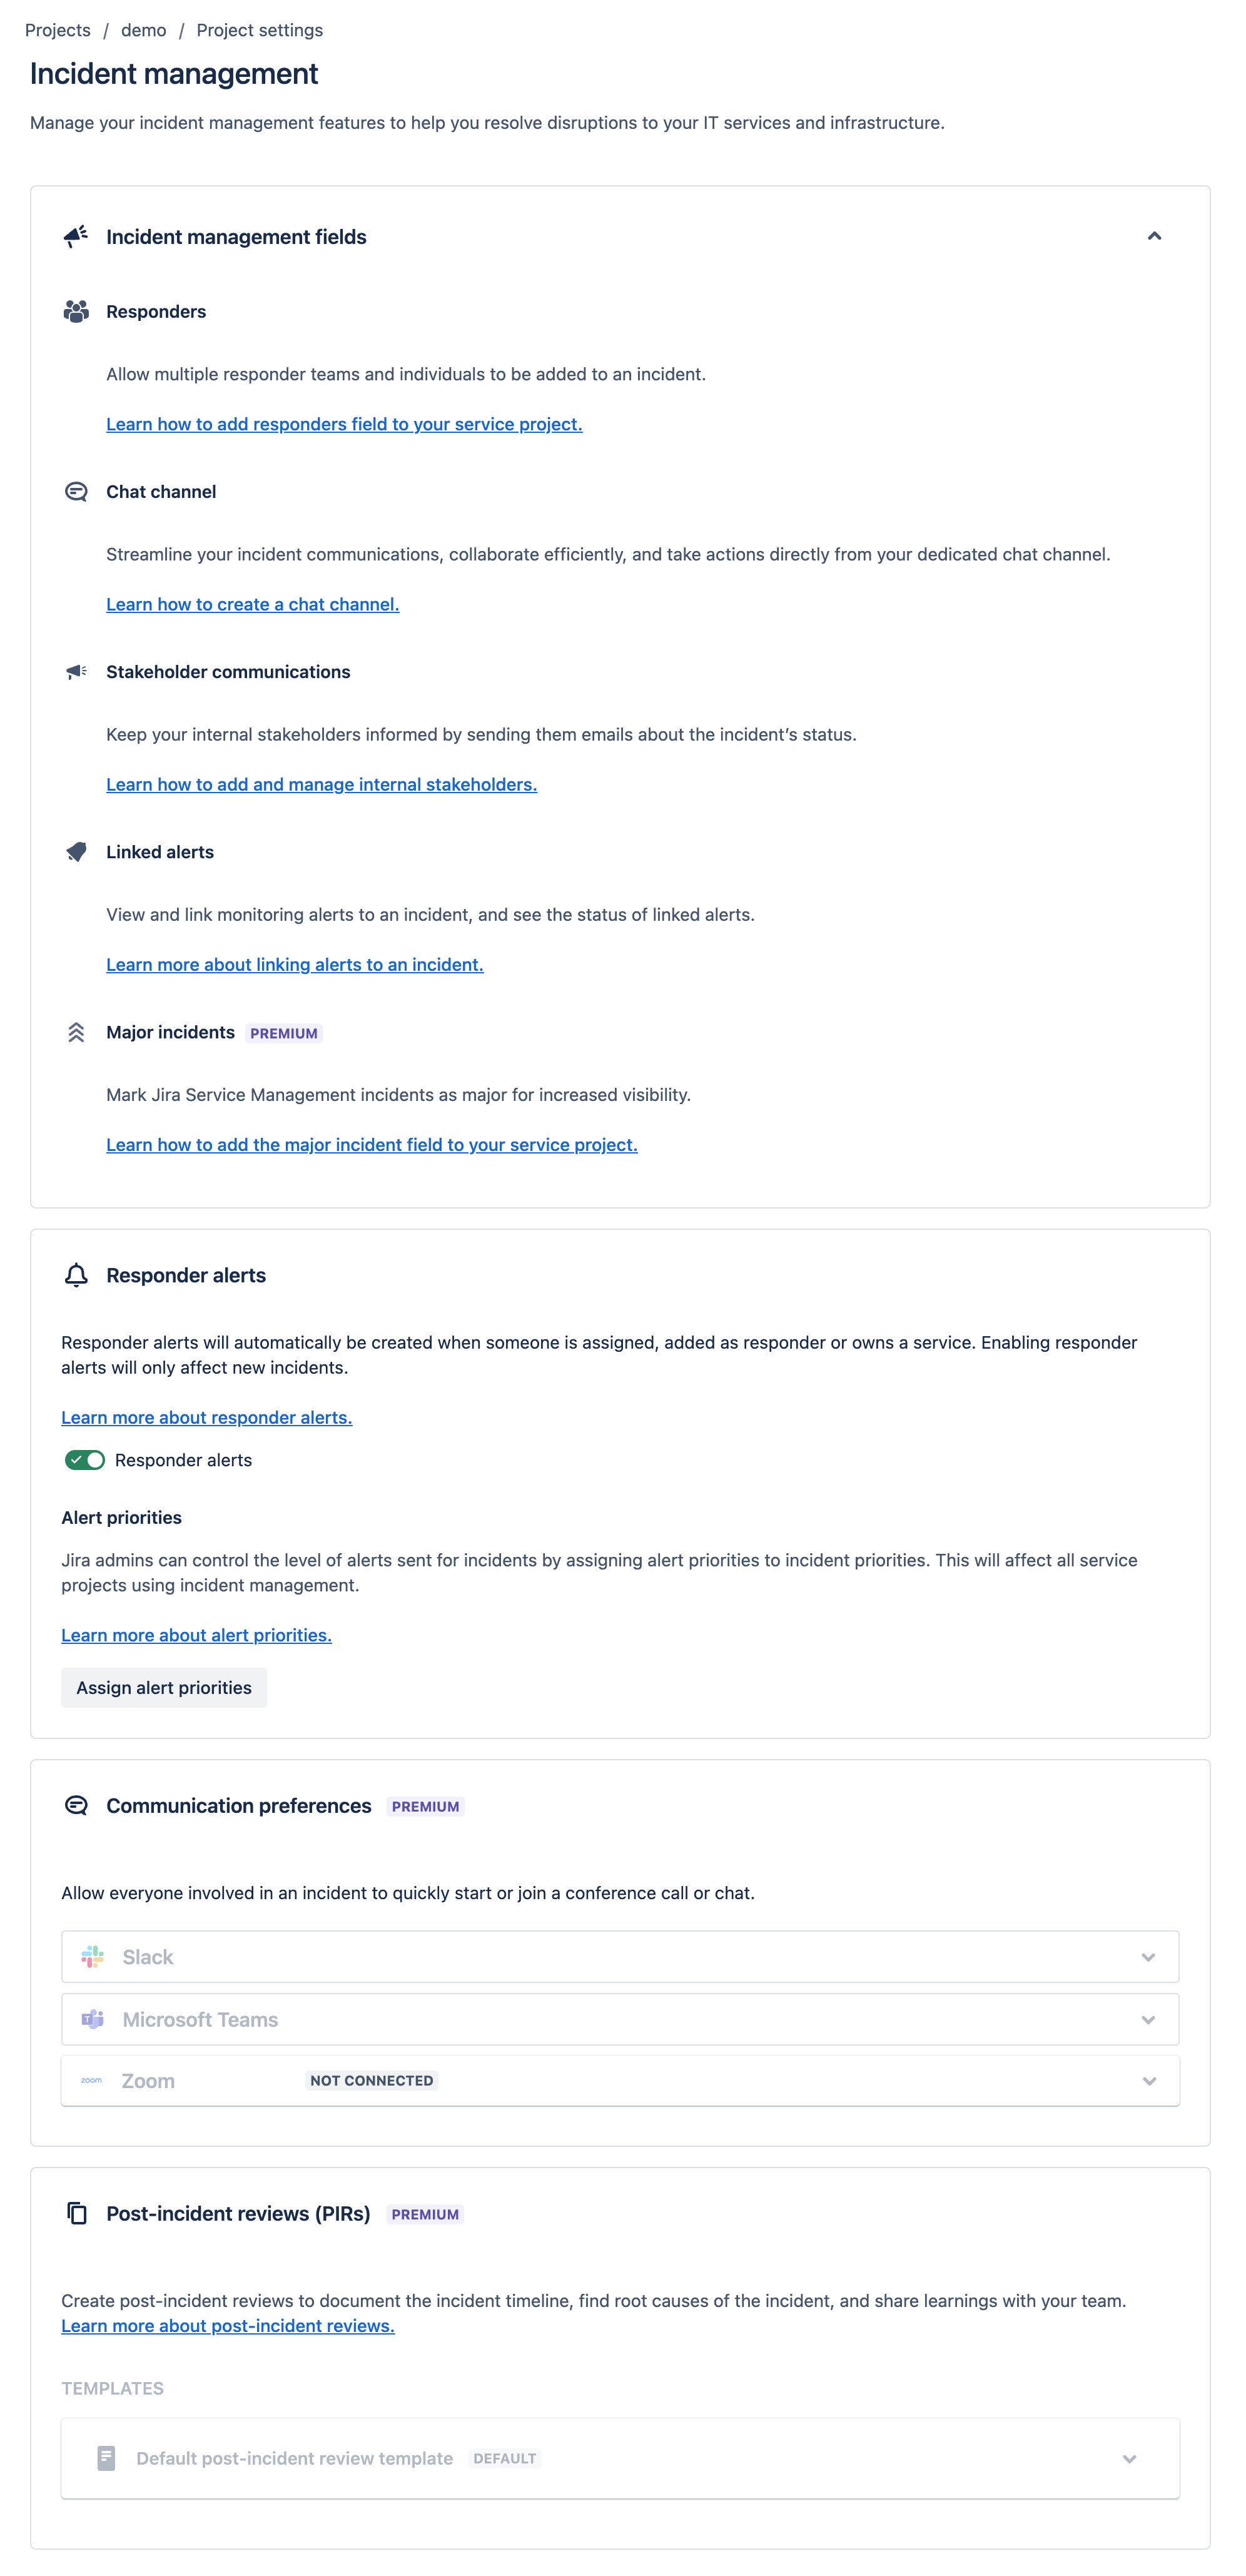
Incident Management
This is a summary page that lists useful articles for managing fields, in both Standard and Premium services, configure responder alerts, set communications preferences and Post Incident Reviews, the latter two being Premium services.
Notifications
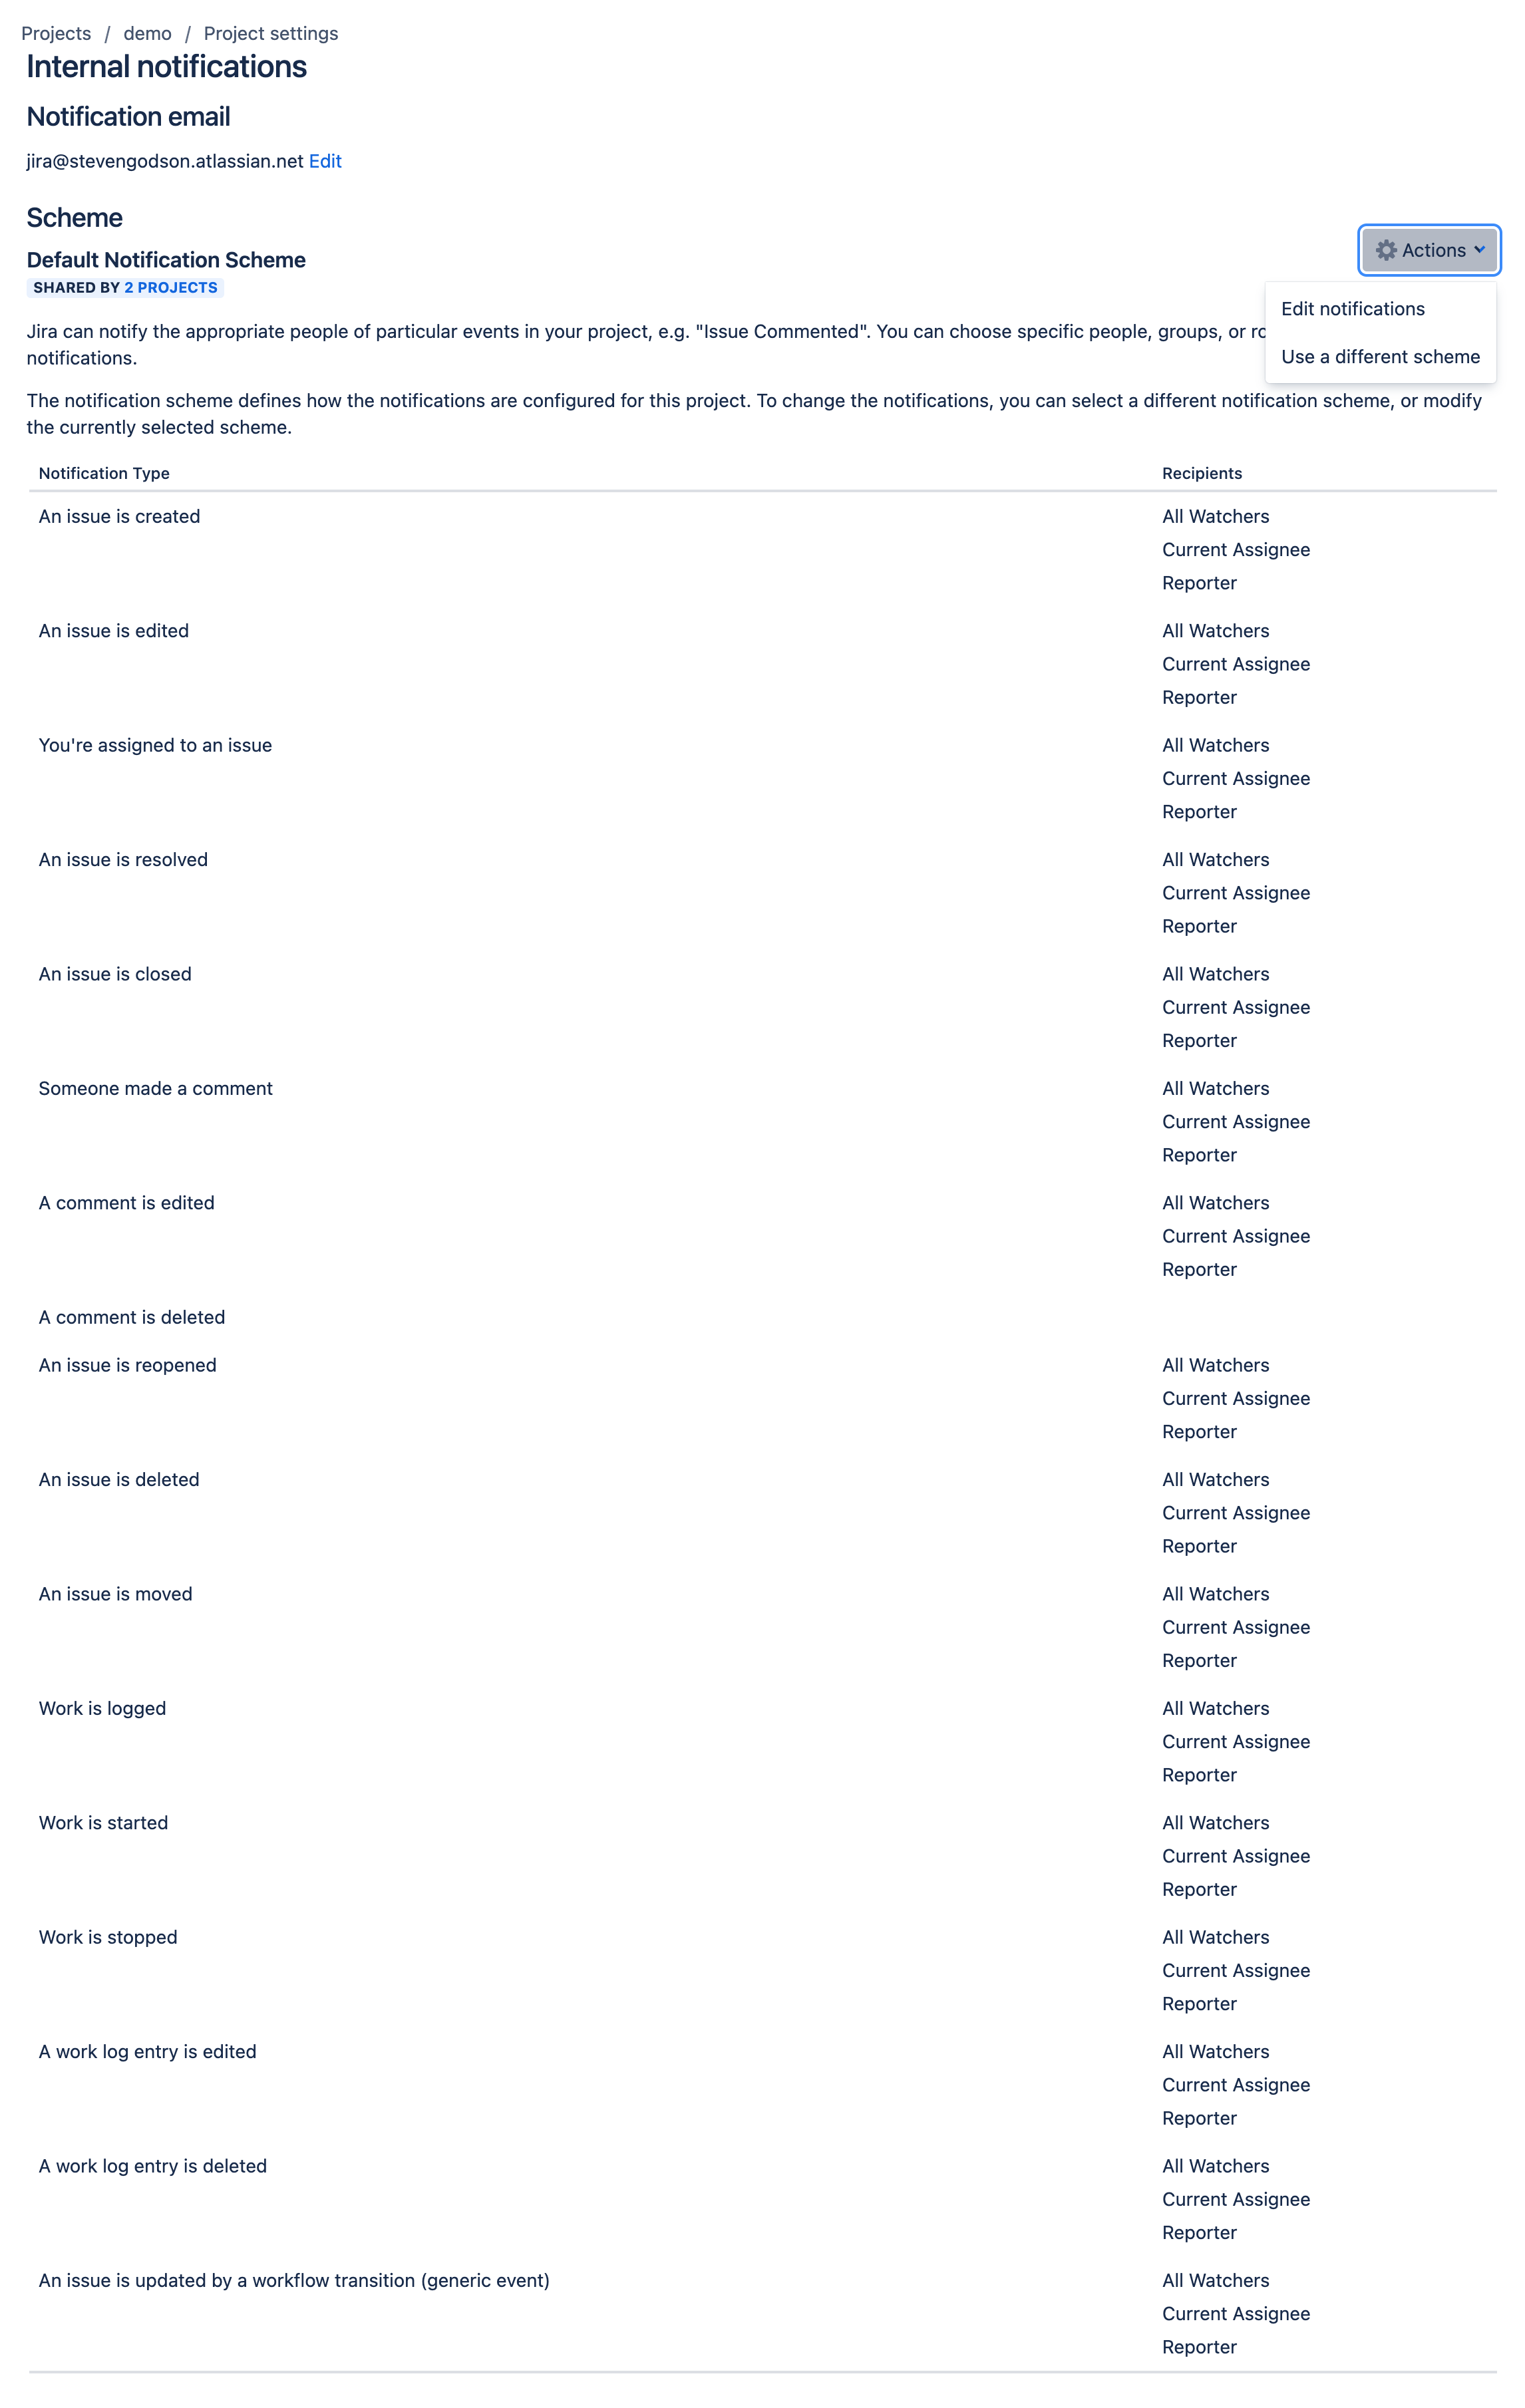
The following screens are used to configure and enable/disable notifications that will be sent internally within your support organisation e.g. issue assigned to agent or Priority 1 Incident raised, and notifications that will be sent to customers e.g. request created or approval required.
Depending on how your service desk operation is designed, you can switch off all customer notifications or customise the templates (Premium functionality).
Internal notifications
Customer notifications

Language Support
This setting allows you to add support for additional languages to your JSM project.
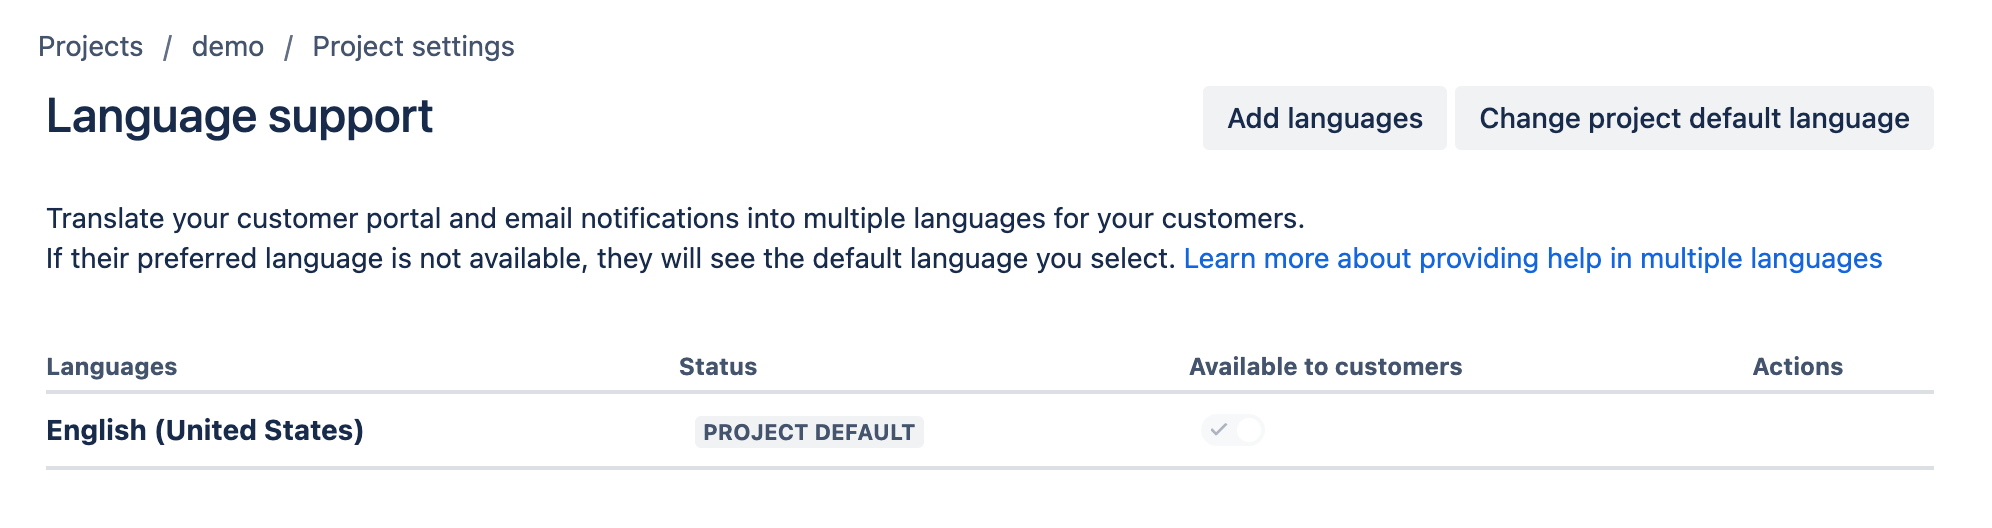
The main page lists the default language for the JSM project. This is what was selected when the JSM project was originally created. From this page you can
Change the default language
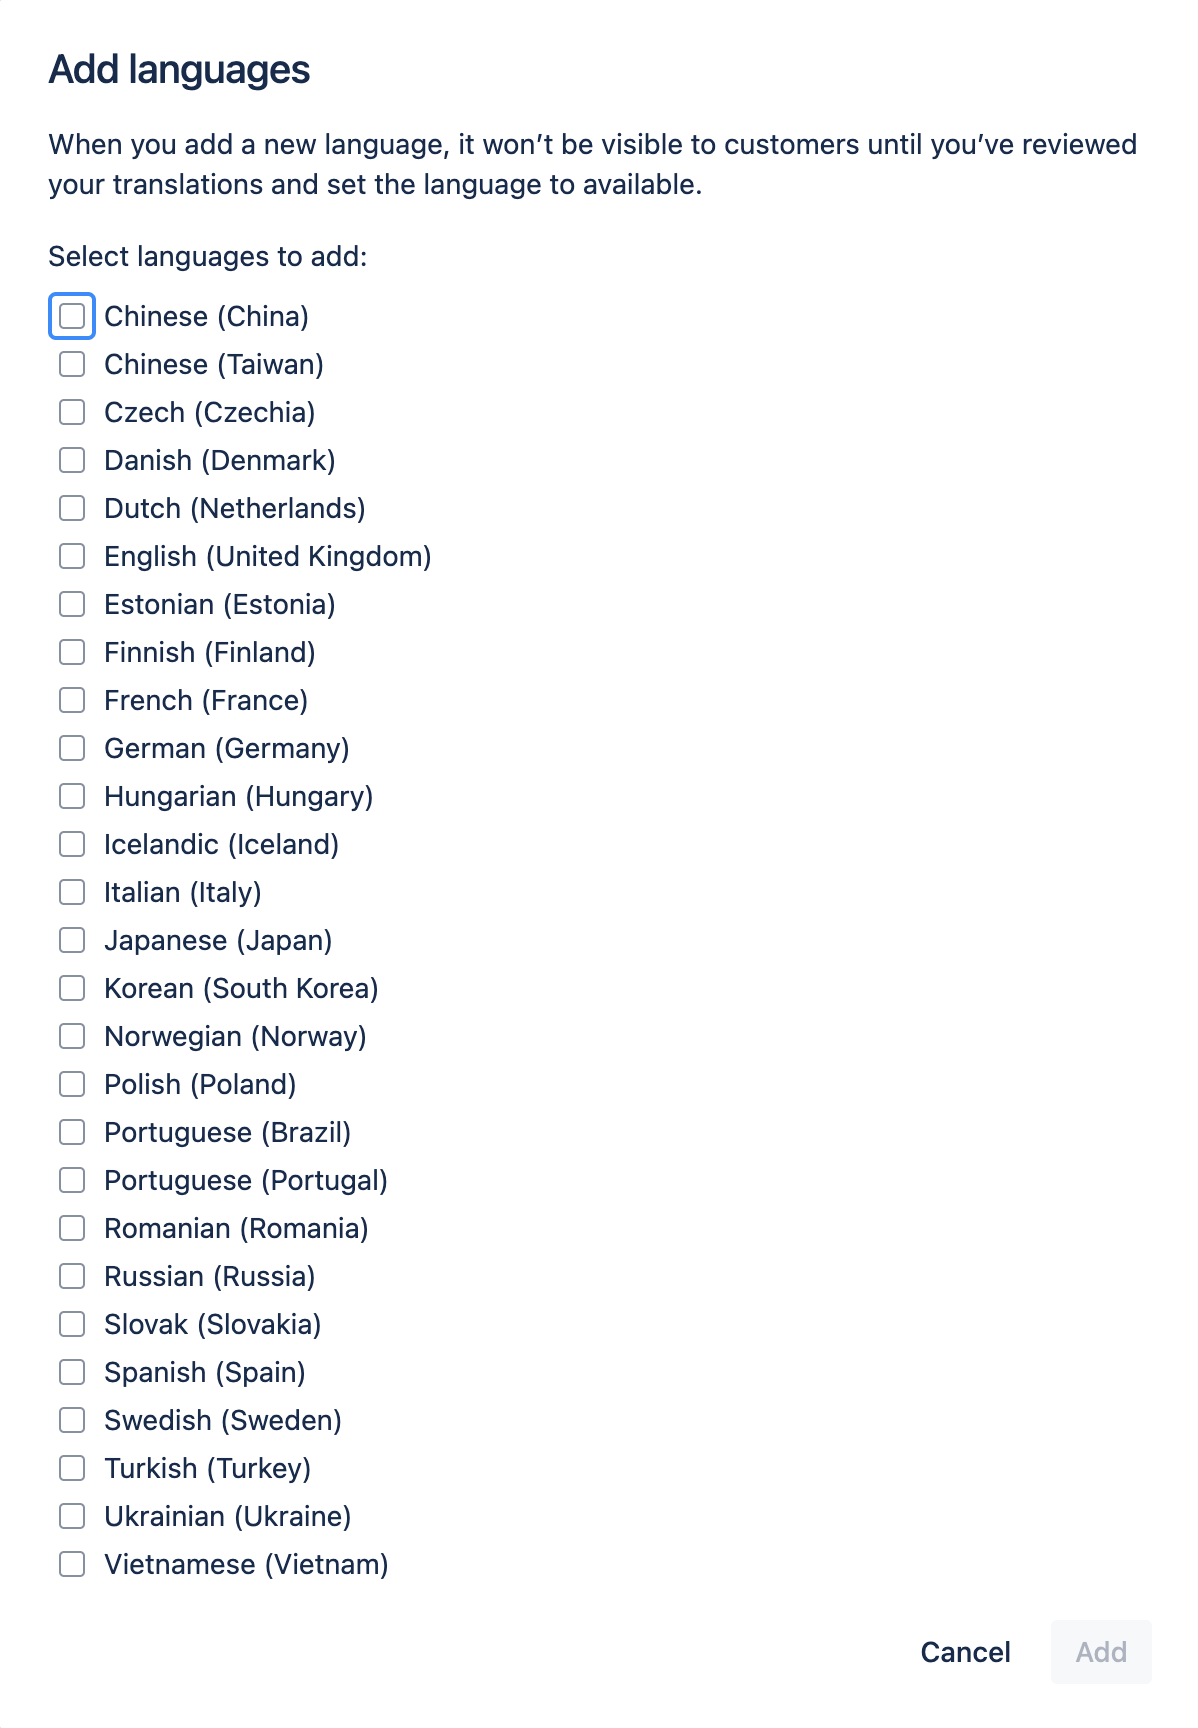
Add a new language by selecting one or more of the languages shown in the pop-up when you click on Add Languages button, as shown below
Apps
Microsoft Teams integration
From this screen you can integrate JSM with your organisations M365 Teams solution. This gives you the ability for customers to engage your service desk through Teams channels, assuming they either sit on your Teams or allow integration with theirs.
You should check with your IT Security Manager, prior to going down this path, to ensure that you are compliant with your organisation’s information security policies.
Once implemented you can expand the capability through the use of integrated workflows, automation and the AI Agent (additional costs apply).
Slack integration
From this screen you can integrate JSM with your organisations Slack solution. This gives you the ability for customers to engage your service desk through Teams channels, assuming they either sit on your Teams or allow integration with theirs.
You should check with your IT Security Manager, prior to going down this path, to ensure that you are compliant with your organisation’s information security policies.
Once implemented you can expand the capability through the use of integrated workflows, automation and the AI Agent (additional costs apply).
Development tools

As you can see, this screen lets you connect Developer tools to JIRA.
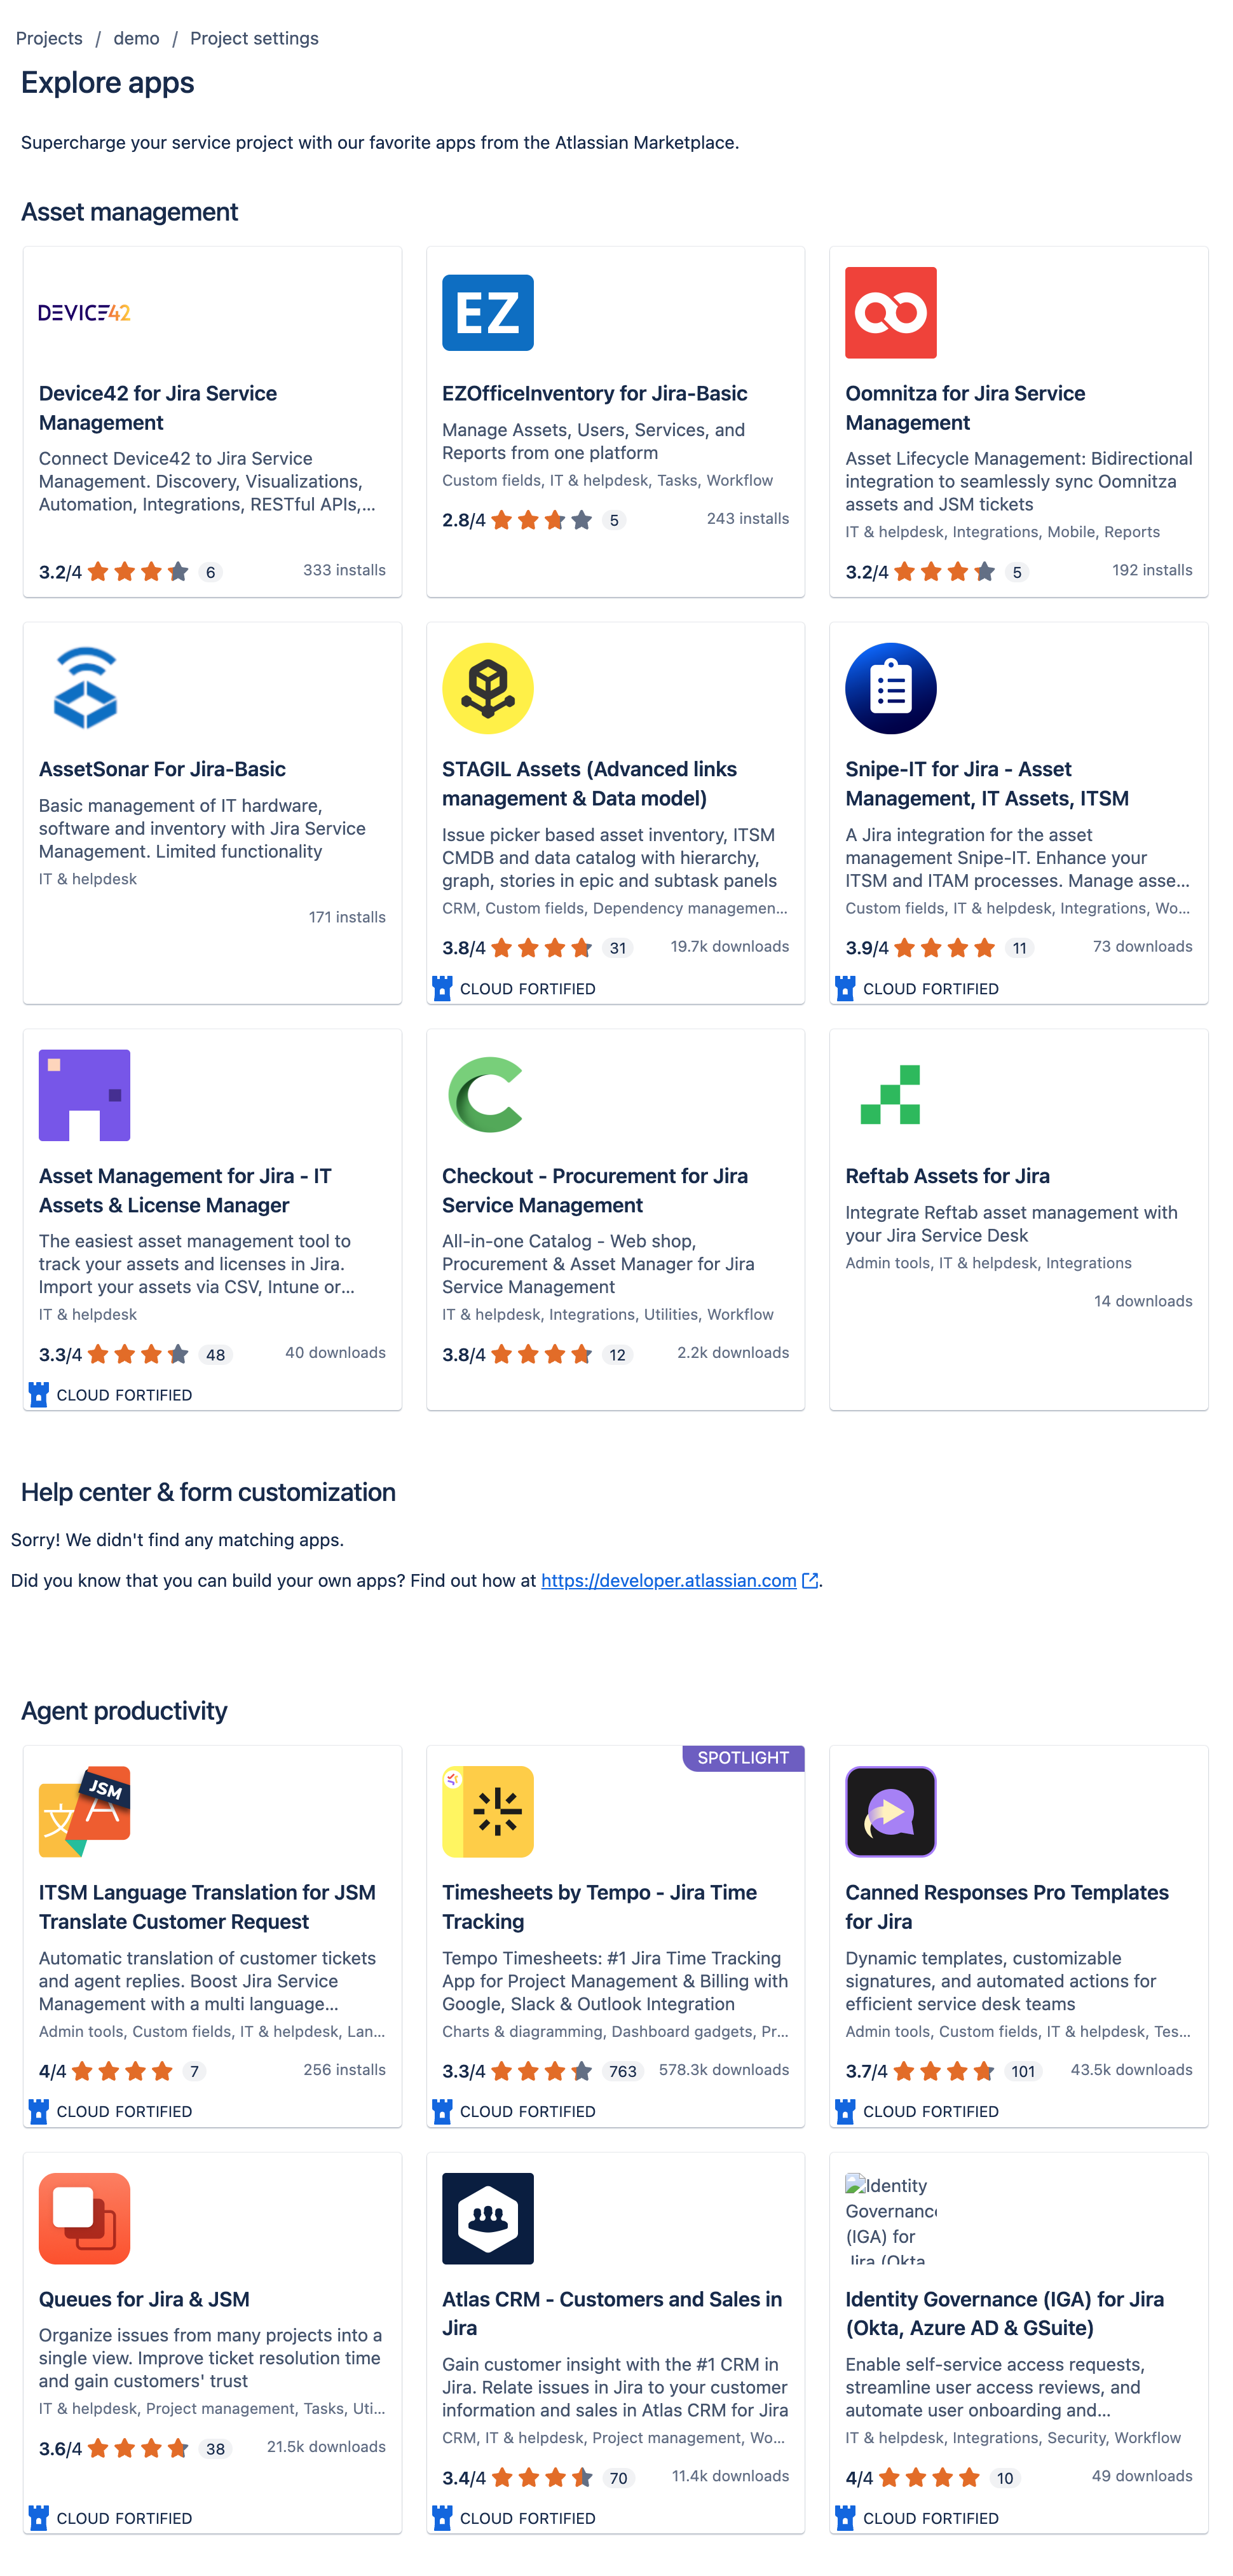
Explore apps
This page lists the additional Atlassian Marketplace apps that JSM can integrate with. If you click on one of the tiles it shows you
Details of the app
Privacy and security statements
Support details
Version information
Whether there is a cost for using it
Additional resources
If you want to deploy one just click on the Get it now button to initiate the integration.
Versions
This screen gives you the functionality to list Releases of what you are supporting with your JSM service desk.
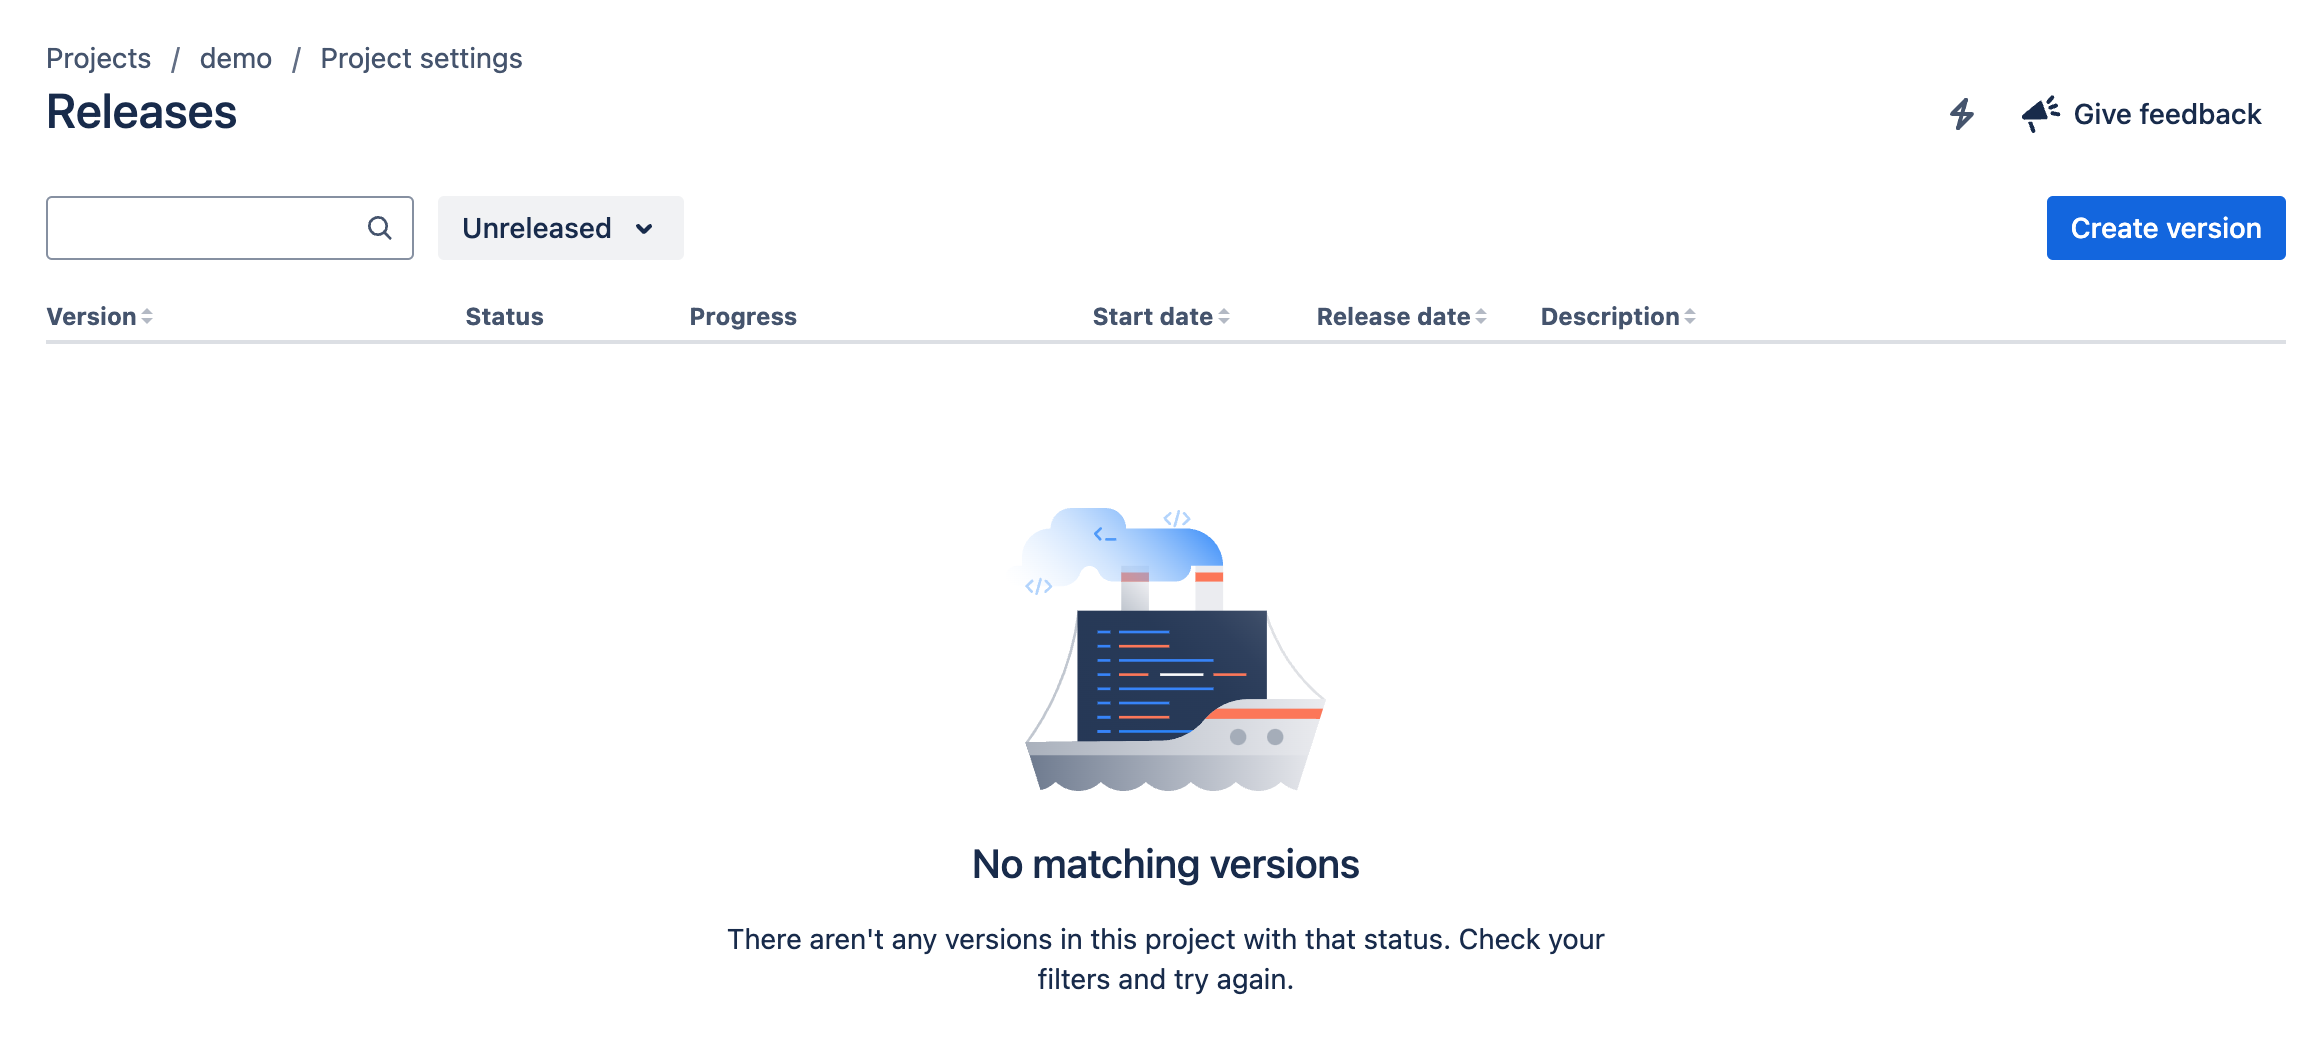
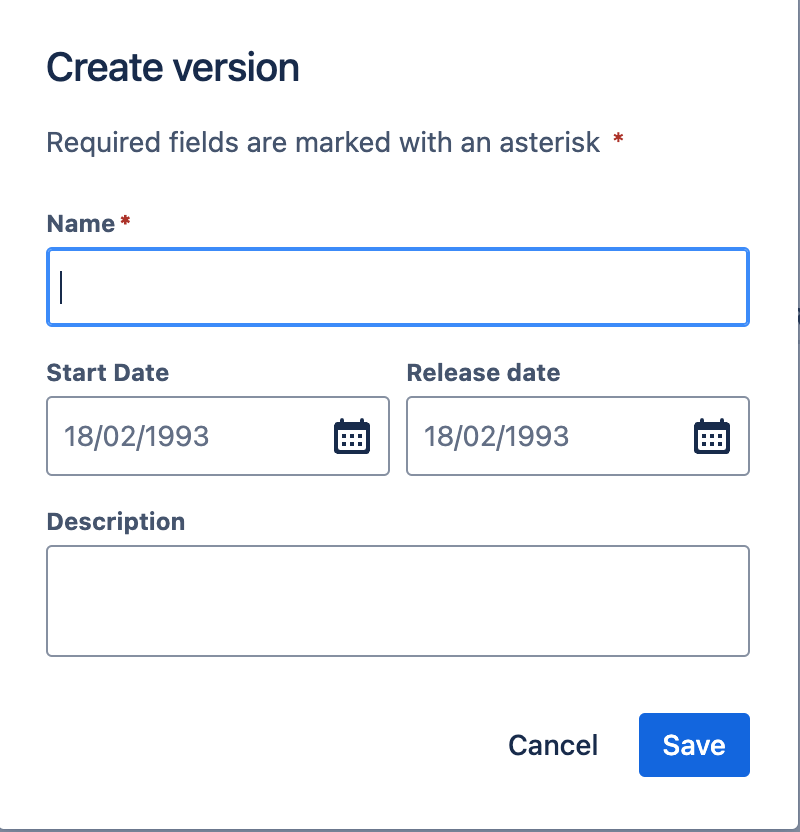
You can add a new version by clicking on the Create version button and populating the pop-up that opens.
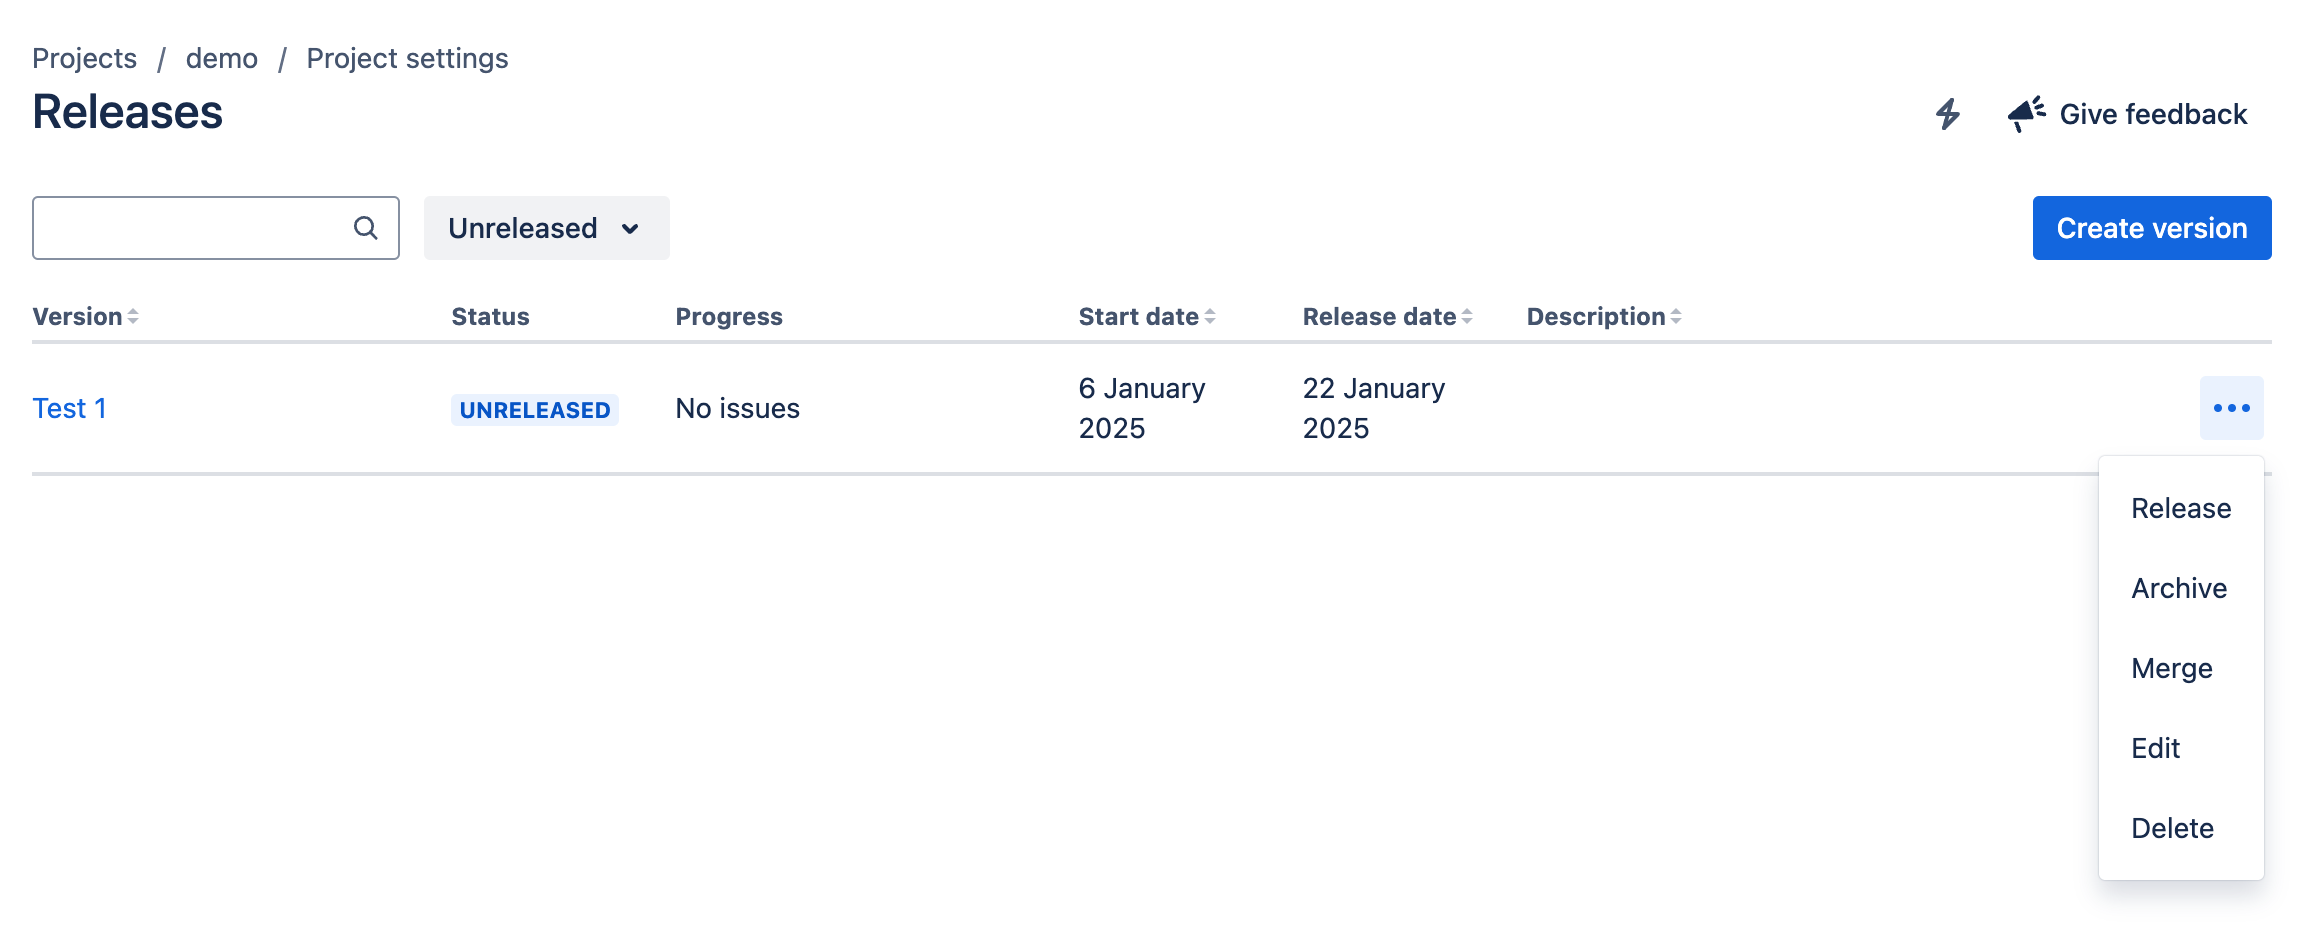
Once added you can change the status of the record to
Released
Archived
Merged
Edited
Deleted
Components
The Components screen is where the components of the service(s) that you are supporting, using your JSM instance, are managed. This list populated the Components field that can be seen in the Request Management -> Fields menu.
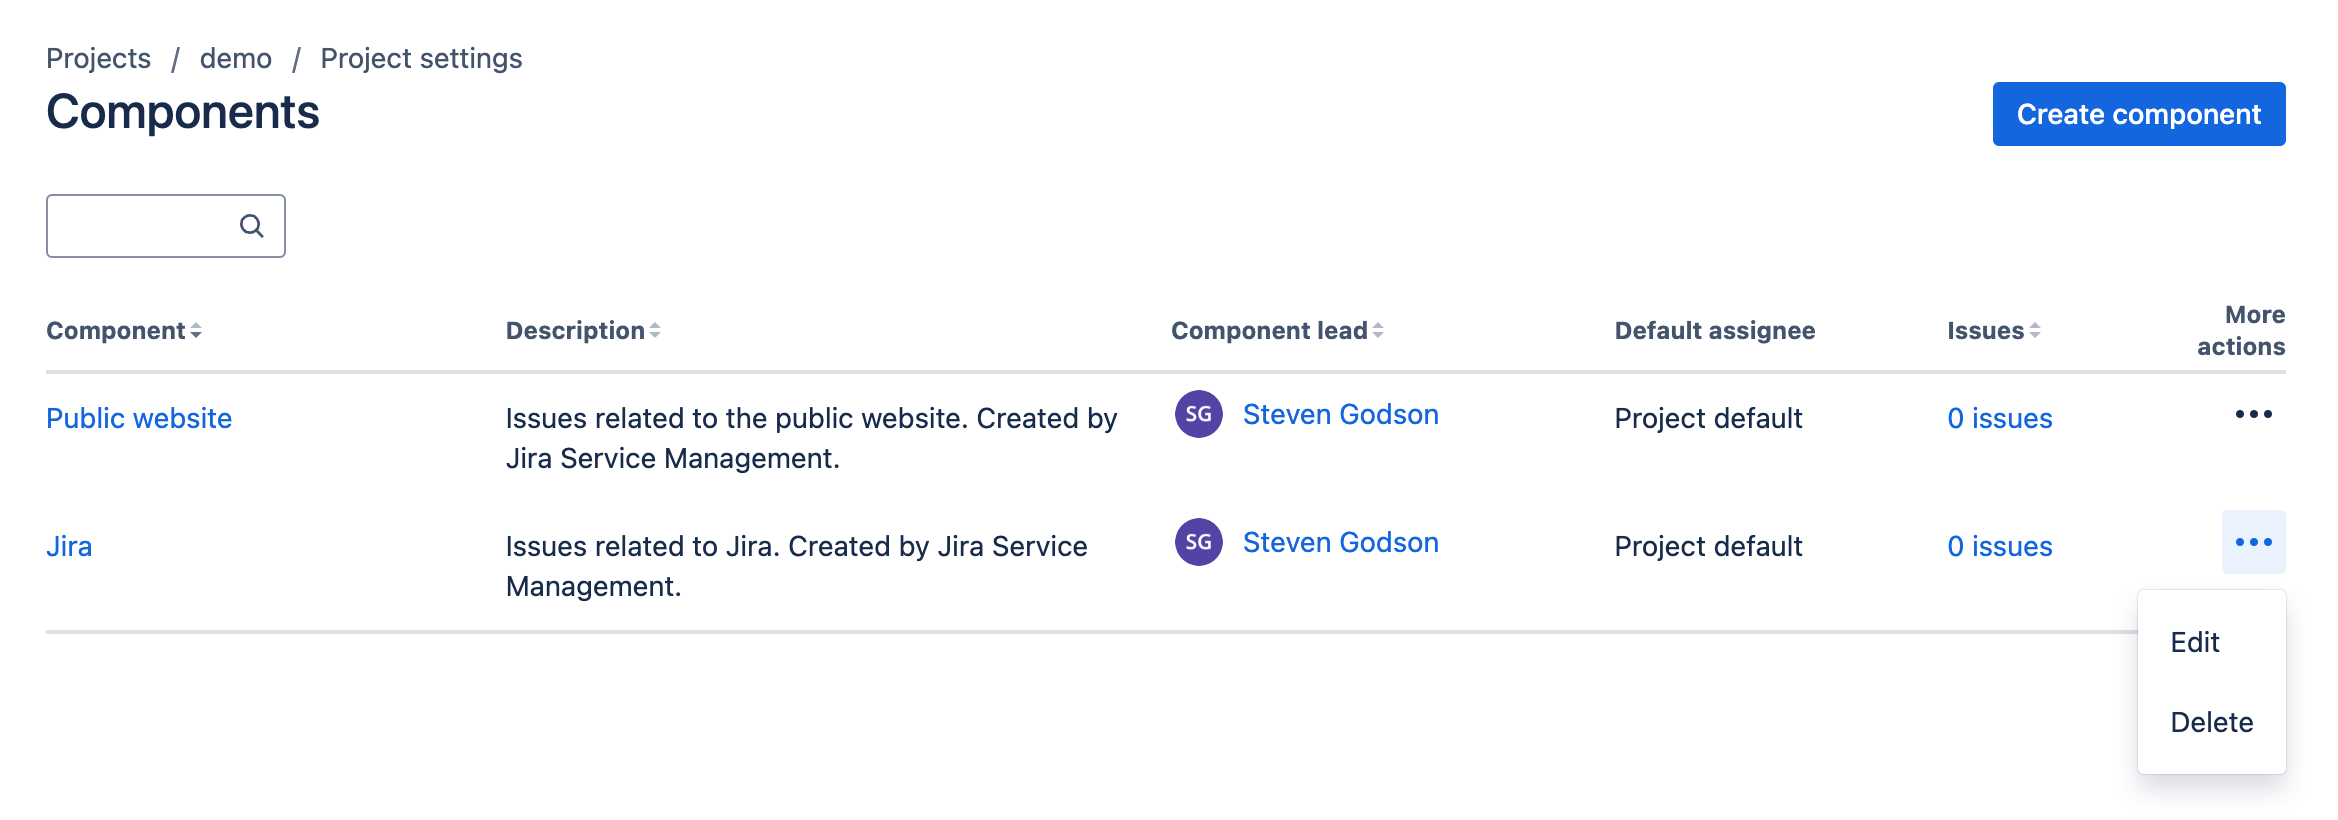
From this page you can Edit and Delete components.
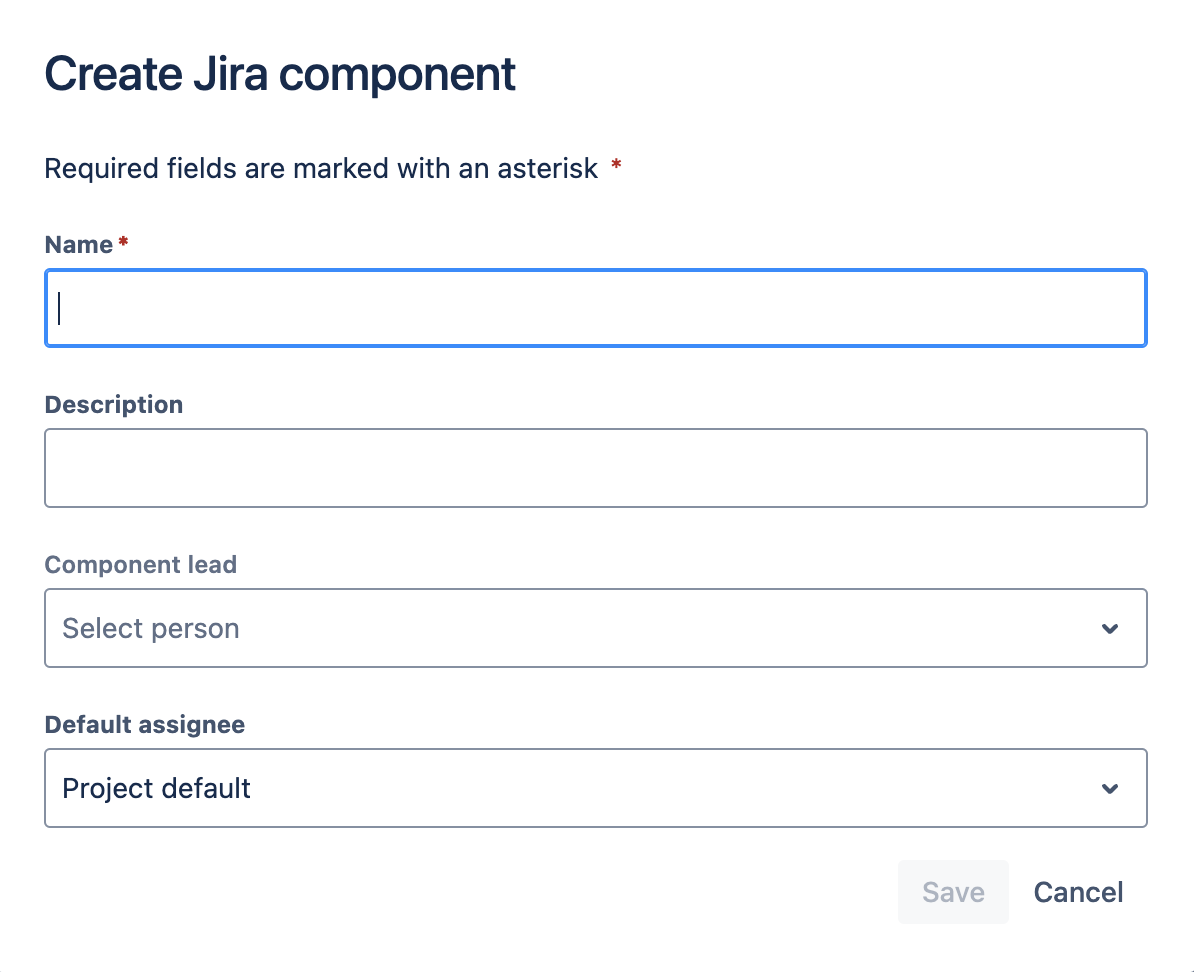
To add additional components, simply click on Create component, fill out the pop=up form that appears and click on Save.
Conclusion
We have come to the end of the fourth article in this series. We have explored what JSM is, gone through some of the Project Settings feature.
In the next article we will continue to go through the Access Management options to discover just how versatile JSM can be.
Hopefully this has been useful to you and I wish you well on your ITSM journey…